Digitize your notes with the Azure Computer Vision READ API
In this article, you will use the Azure Computer Vision READ API to convert your handwritten notes into digital documents.
The Computer Vision service is a cognitive service in Microsoft Azure and provides pre-built, advanced algorithms that process and analyze images. The Computer Vision service uses pre-trained models to extract printed and handwritten text from photos and documents (Optical Character Recognition) and visual features (such as objects, faces, auto-generated descriptions) from images (Image Analysis) and videos (Spatial Analysis).
In this article, we will explore the pre-trained models of Azure Computer Vision service for image analysis. You will learn how to:
To complete the exercise, you will need to install:
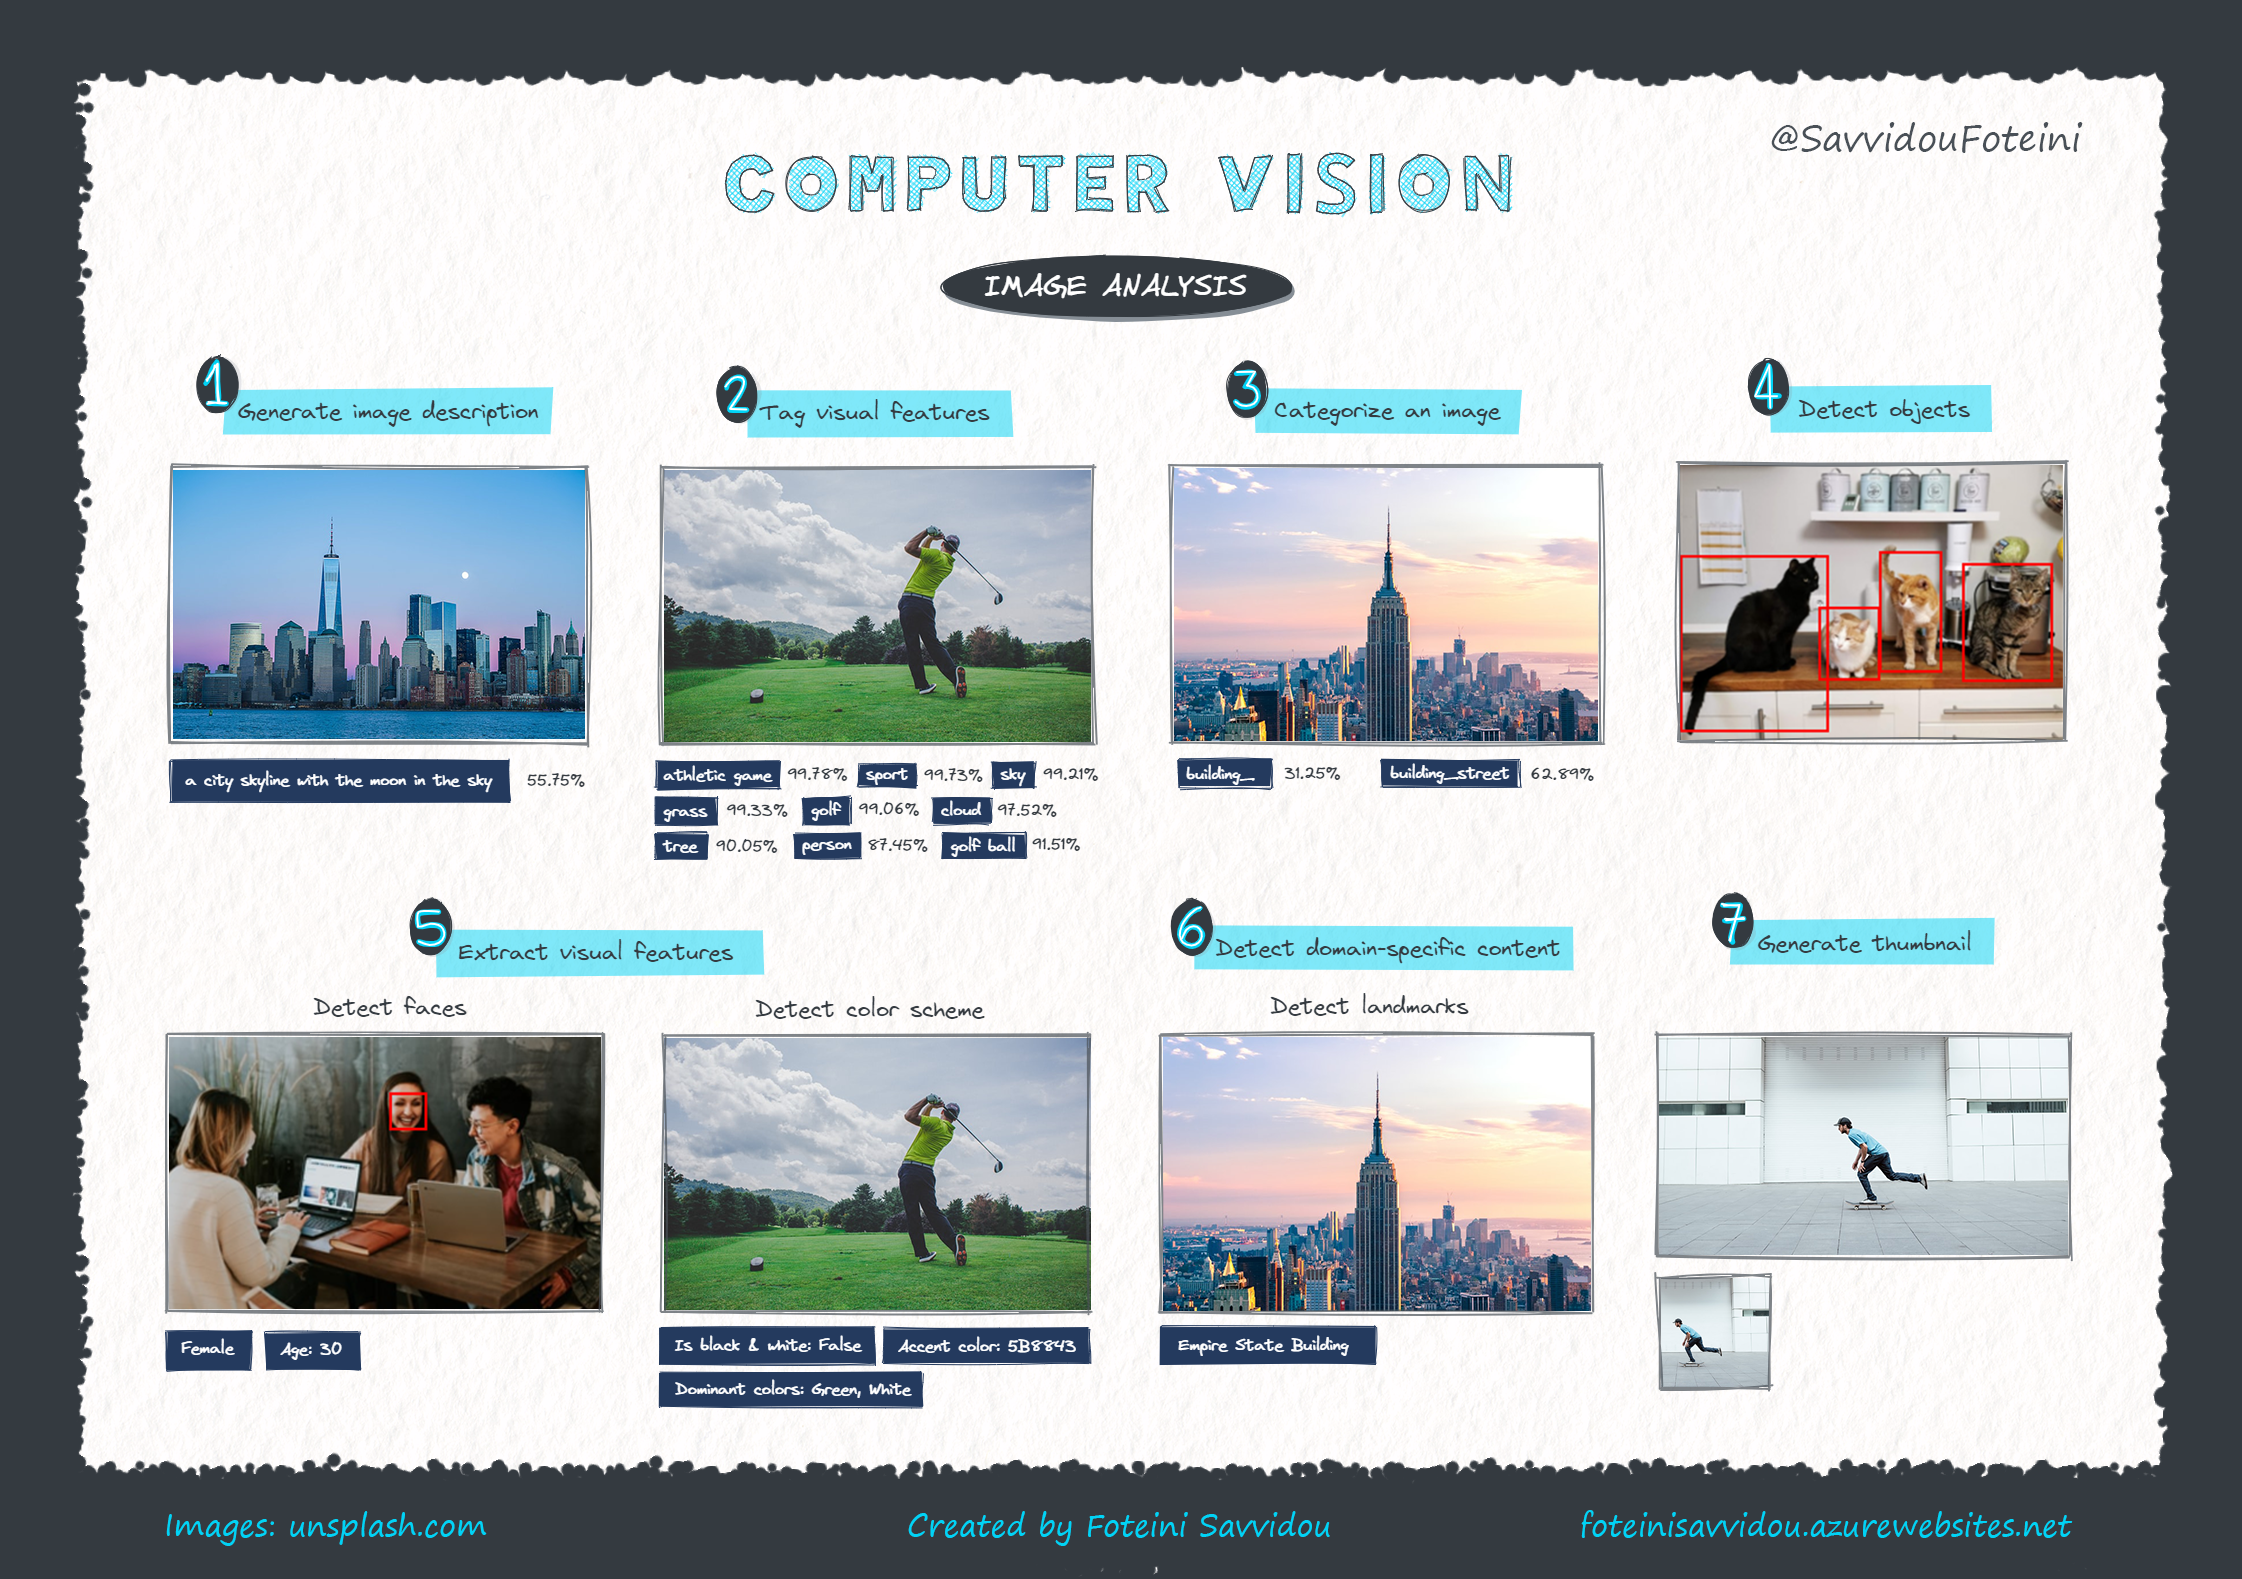
The Computer Vision Image Analysis service can extract many visual features from images. For example, you can build applications that:
Study the following sketch note to explore some examples of image analysis with Azure Computer Vision service.
You can find more information and how-to-guides about Computer Vision Image Analysis service on Microsoft Learn and Microsoft Docs.
To use the Computer Vision service, you can either create a Computer Vision resource or a Cognitive Services resource. If you plan to use Computer Vision along with other cognitive services, such as Text Analytics, you can create a Cognitive Services resource, or else you can create a Computer Vision resource.
In this exercise, you will create a Computer Vision resource.
Sign in to Azure Portal and select Create a resource.
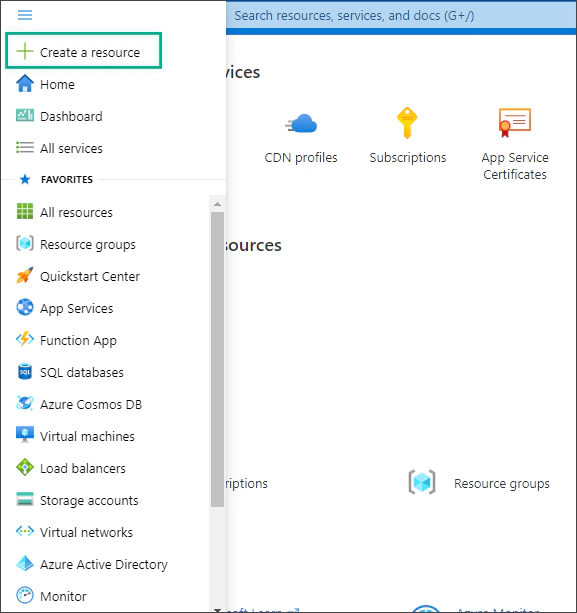
Search for Computer Vision and then click Create.
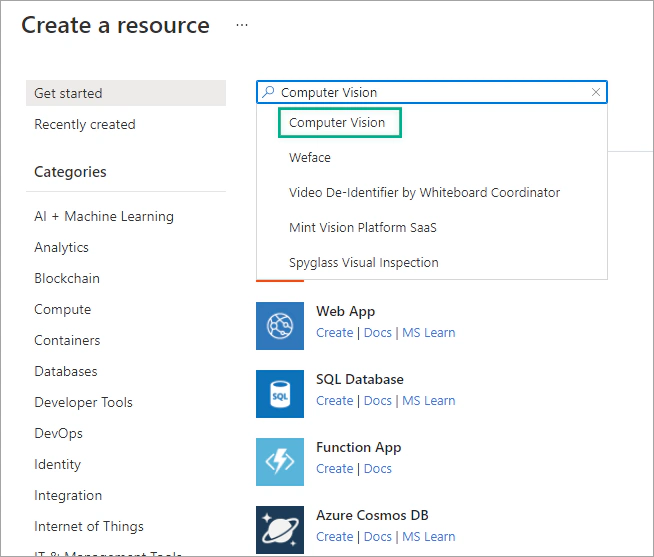
Create a Computer Vision resource with the following settings:
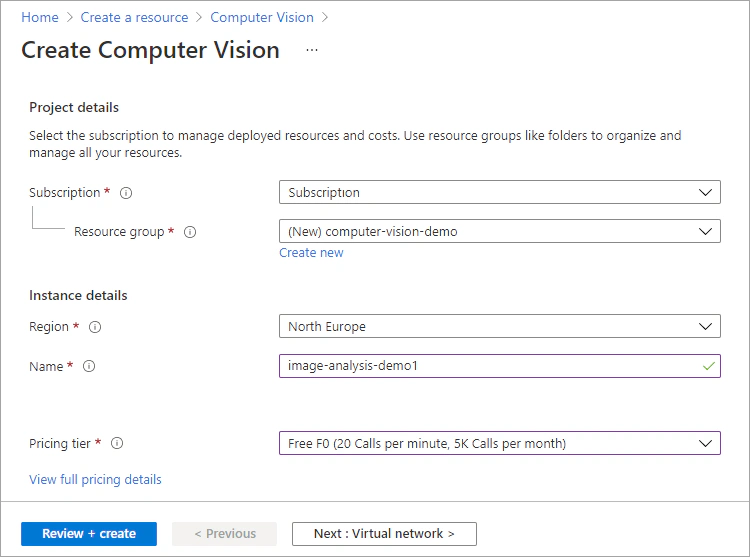
Select Review + Create and wait for deployment to complete.
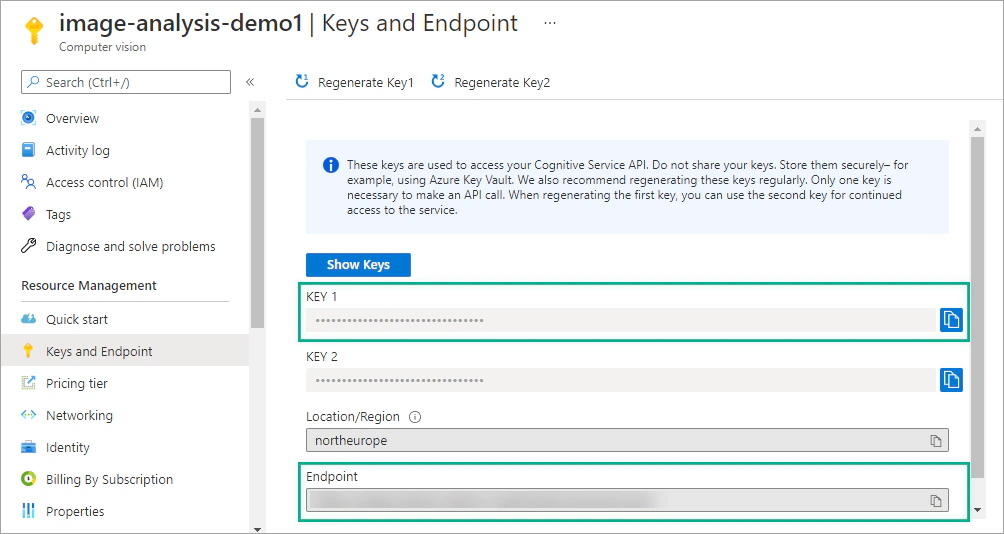
Once the deployment is complete, select Go to resource. On the Overview tab, click Manage keys. Save the Key 1 and the Endpoint. You will need the key and the endpoint to connect to your Computer Vision resource from client applications.
Install the Azure Cognitive Services Computer Vision SDK for Python package with pip:
| |
Create a new Jupyter Notebook, for example image-analysis-demo.ipynb and open it in Visual Studio Code or in your preferred editor.
Want to view the whole notebook at once? You can find it on GitHub.
Import the following llibraries.
| |
Then, create variables for your Computer Vision resource. Replace YOUR_KEY with Key 1 and YOUR_ENDPOINT with your Endpoint.
| |
Authenticate the client. Create a ComputerVisionClient object with your key and endpoint.
| |
First download the images used in the following examples from my GitHub repository.
The following code generates a human-readable sentence that describes the contents of an image.
| |
The suggested description seems accurate. Let’s try another image. In the next cell of your notebook, add the following code, which generates a description for the cows.png image.
| |
Computer Vision service’s algorithms process images and return tags based on objects (such as, furniture, tools, etc.), living beings, scenery (indoor, outdoor) and actions identified in the image. This code prints a set of tags detected in the image.
| |
Computer Vision service returns a set of categories detected in an image. There are 86 categories organized in a parent/child hierarchy.
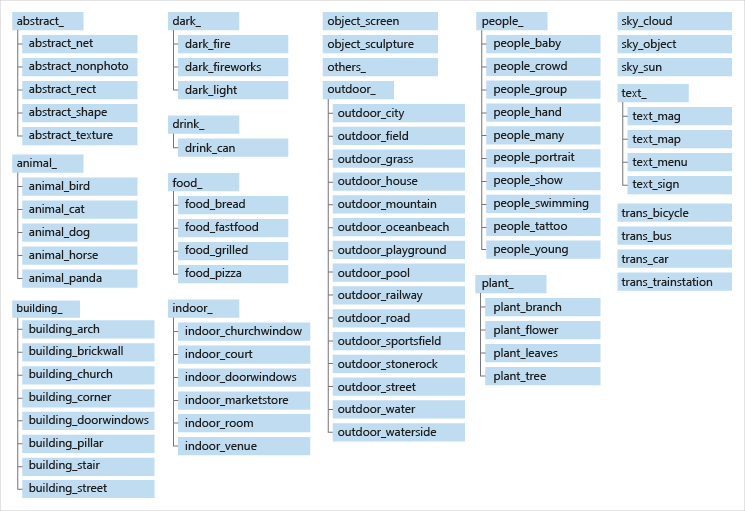
The following code prints the detected categories of an image.
| |
The categorization feature is part of the analyze_image() function. This operation extracts a rich set of visual features based on the image content. By default, the analyze_image() function returns image categories. You can specify which visual features to return by using the optional visual_features parameter. The visual_features parameter is a list of strings indicating what visual feature types (such as, categories, faces, color, brands, etc.) to return. You will learn more about the available visual feature types in the following examples.
This example detects faces in an image and marks them with a bounding box. The Computer Vision service can detect faces in images and generate selected face features and rectangle coordinates (top and left coordinates, width and height) for each detected face.
| |
The following code detects four cats in the cats.png image and prints a bounding box for each cat found.
| |
In this article, you learned how to use Azure Computer Vision to analyze images and extract visual features. The Azure Cognitive Services Computer Vision SDK for Python package supports several methods for generating descriptions, tags and categories for images, detecting objects, faces, celebrities and landmarks and creating thumbnails. You can find more details for the library at the computervision Package documentation.
In the next article, we will explore Optical Character Recognition with Azure Computer Vision!
If you have finished learning, you can delete the resource group from your Azure subscription:
In the Azure Portal, select Resource groups on the right menu and then select the resource group that you have created.
Click Delete resource group.

In this article, you will use the Azure Computer Vision READ API to convert your handwritten notes into digital documents.
This post will take you through the newest Read OCR API of Azure Computer Vision, which is used for extracting text from images.
In this post, you will explore the latest features of Azure Computer Vision and create a basic image analysis app.
In this article, you will build a simple Python app that turns your handwritten notes into digital documents using Azure Computer Vision.