Automate Document Processing with Azure Form Recognizer
The session “Automate Document Processing with Azure Form Recognizer” presented at EMEA Cloud and Modern Workplace Summit 2023.
Organizations of all types rely on automated document processing and data extraction to streamline their operations. This article outlines a potential solution for automating PDF form processing, utilizing Azure Form Recognizer for data extraction and Azure OpenAI for “intelligent” data enrichment.
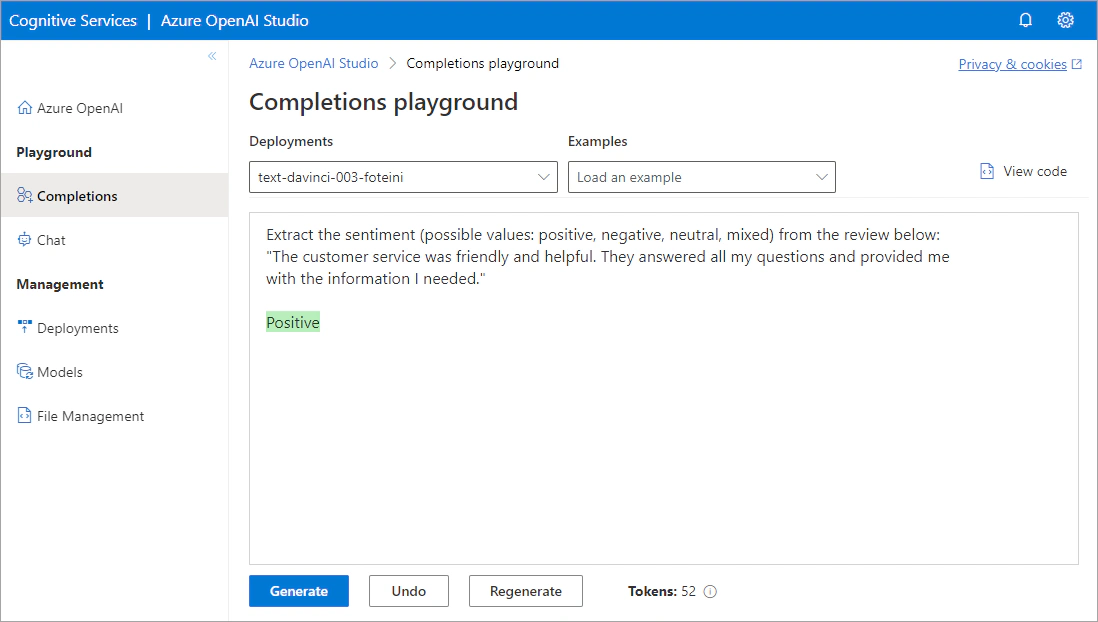
Data enrichment uses Artificial Intelligence (AI) to extract information, uncover patterns, and gain a deeper understanding of the data. This can be achieved through techniques such as key phrase extraction, named entity recognition, sentiment analysis, opinion mining, and custom models to identify essential information. To enrich the data, you can use the pretrained models of the Azure Cognitive Services for Language or train and deploy a custom model in Azure Machine Learning. In this post, I’ll demonstrate how to utilize the Davinci model of the Azure OpenAI Service to perform sentiment analysis and extract key phrases from customer service review forms.
In the two-part series “Automate document processing with Form Recognizer and Logic Apps” you learned how to train custom models in Azure Form Recognizer for extracting key-value pairs from documents and build an end-to-end form processing solution using Form Recognizer, Logic Apps, Azure Cosmos DB, and Power BI.
In this article, we will extend this pipeline by incorporating the Azure OpenAI service to enrich the extracted data. You will learn how to:
The following architecture diagram illustrates the main components involved in the “intelligent” form processing solution that we are building and the information flow. In this post, we will focus on how to integrate the Azure OpenAI service into the pipeline that was built in the previous articles.
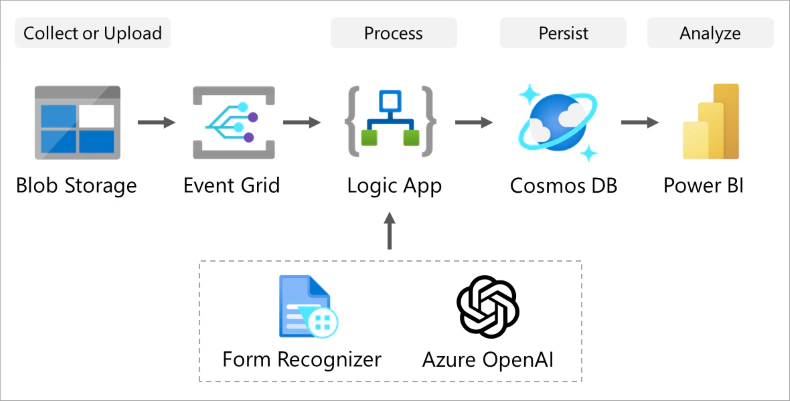
The information flow corresponding to the above architecture diagram is described as follows:
You will create an Azure OpenAI resource through the Azure portal.
Sign in to the Azure portal and search for OpenAI.
In the Create Azure OpenAI page provide the following information:
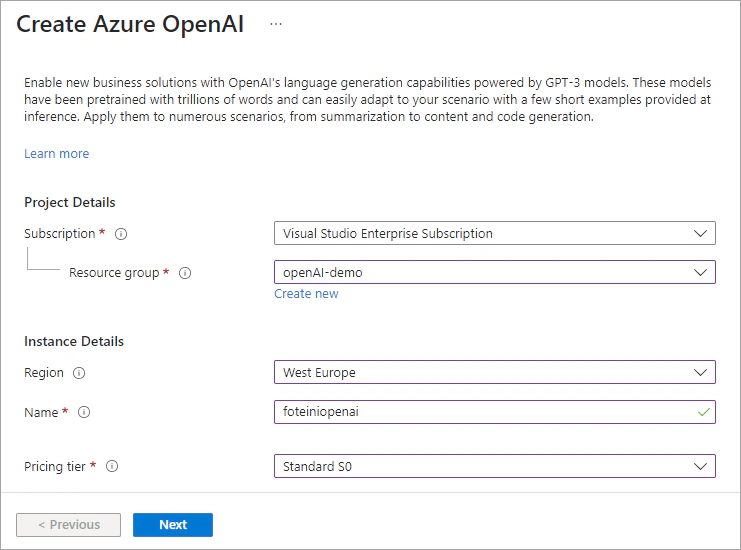
Select Review + Create and then Create.
Once the deployment is complete, navigate to the Azure OpenAI Studio.
Before you can use the Azure OpenAI service to generate text, you need to deploy a model. There are several available models in the Azure OpenAI Studio, each of which is tailored to a specific use case. In this post, you will deploy the text-davinci-003 model.
In the Azure OpenAI Studio, select Deployments under Management.
Click on + Create new deployment, and deploy a new model with the following settings:
text-davinci-003Once the model is deployed, you can test it in the Completions playground.
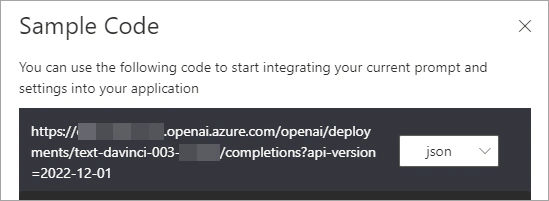
In the Completions playground, click View code. In the Sample Code window, save the endpoint of your deployed model. You will need this URL in the next step.
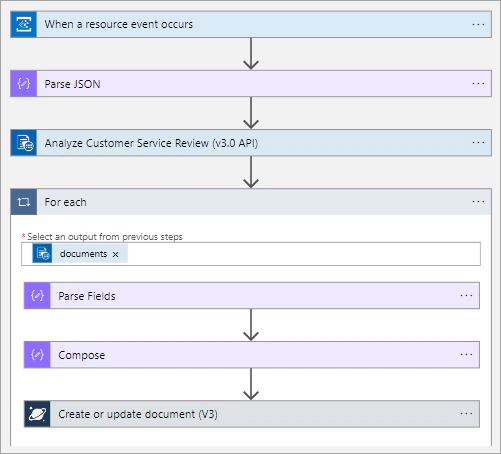
In a previous article, you’ve built the workflow below. This pipeline receives a form that is uploaded in an Azure Storage container, extracts the fields from the form and saves the extracted data in Azure Cosmos DB.
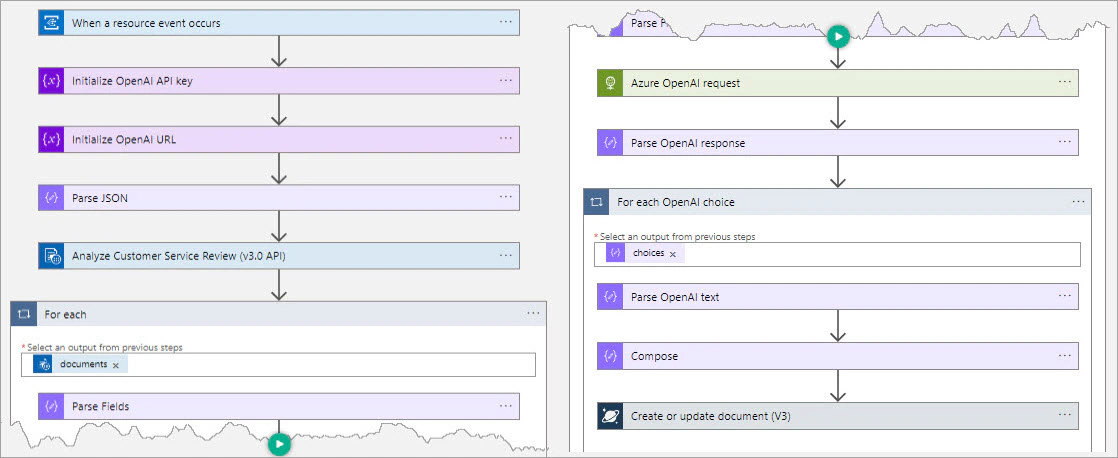
You are going to extend this pipeline by adding an HTTP request action to send a request to the Azure OpenAI service. The workflow is illustrated in the following image.
You will build the form processing workflow using the Logic App Designer.
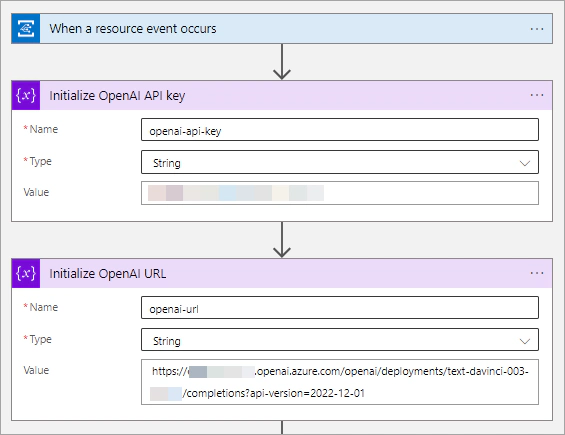
After the When a resource event occurs trigger, add two Initialize variable actions. Create two variables named openai-api-key and openai-url to store the Key and the URL of your Azure OpenAI resource, respectively.
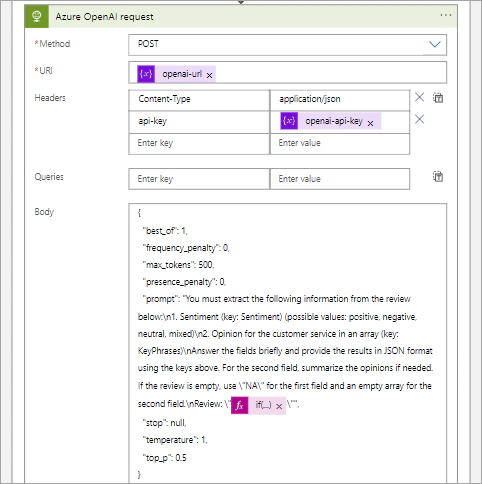
Under the Parse Fields block, select the plus (+) sign to add a new action. Select the HTTP action and enter the following information:
Method: POST
URI: openai-url
Headers:
| Content-Type | application/json |
|---|---|
| api-key | openai-api-key |
Body:
| |
Replace IF EXPRESSION with the following expression, which extracts the value associated with the field Comments.
| |
The output from the completions API will look as follows:
| |
Add a Parse JSON action to extract the response of your OpenAI model. Specify the following details:
Body.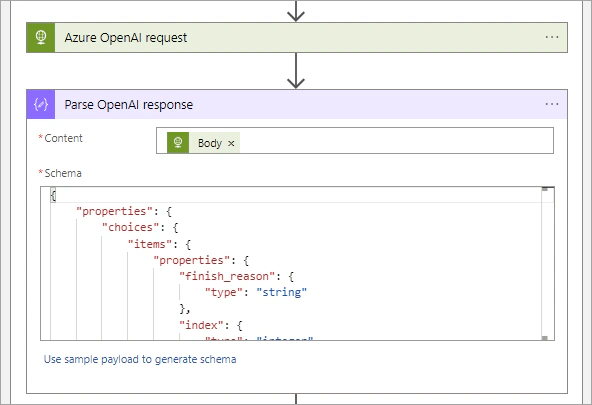
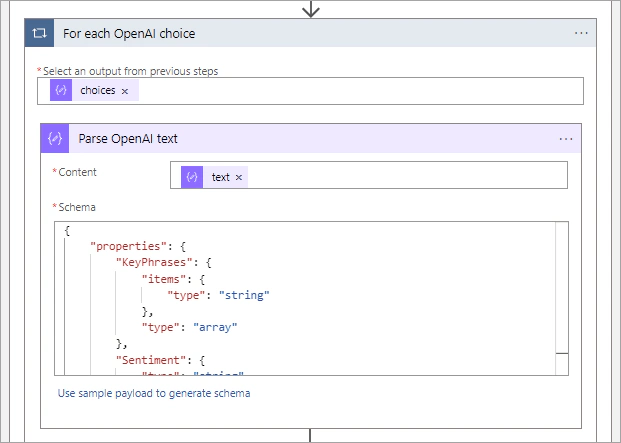
Then, use a second Parse JSON action to extract the values generated by the OpenAI API for the keys named Sentiment and KeyPhrases. Enter the following information:
Content: Select Add dynamic content and find the block called text under Parse OpenAI response.
Schema: To generate the schema, use a sample JSON generated by the OpenAI API or the following schema:
| |
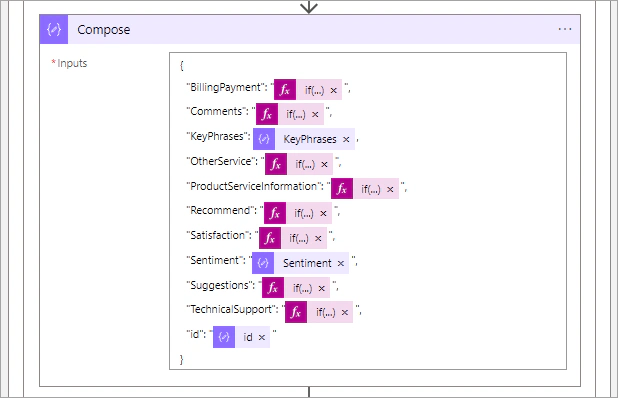
Modify the existing Compose action to include the information generated by Azure OpenAI. To extract the values associated with the fields Sentiment and KeyPhrases, select Add dynamic content and choose the respective blocks.
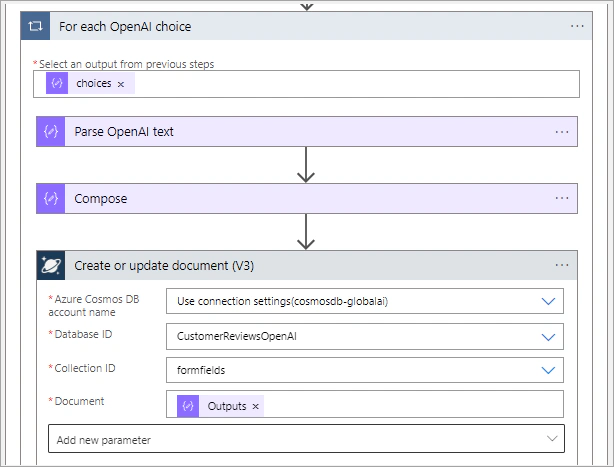
Modify the Create or update document (V3) action as needed.
Save the workflow and then click Run Trigger > Run. Upload a file to your Azure Storage container to test the Logic App.
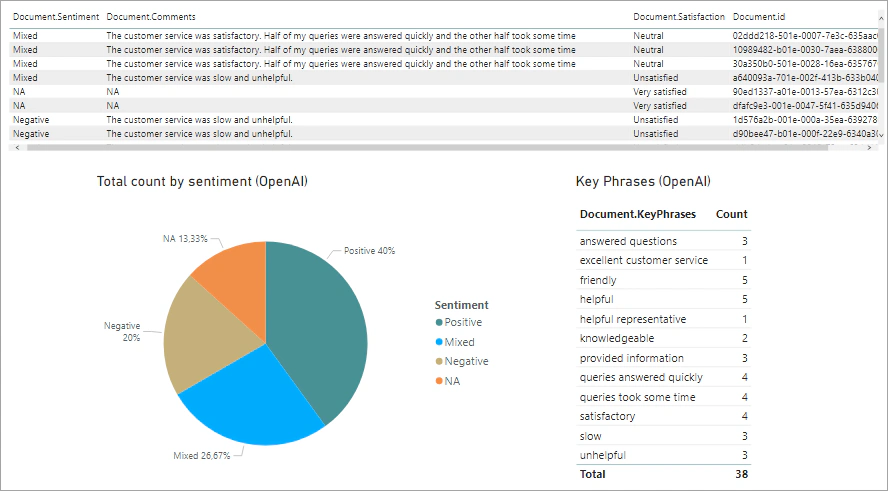
You can use Power BI to visualize the results obtained from the form processing workflow. If you don’t have a Power BI subscription, you can use Power BI Desktop, which is a free service.
Below you can see a simple Power BI dashboard that I created to visualize the data generated by the Azure OpenAI service.
In this article, you created an end-to-end automated form processing solution using Form Recognizer, Logic Apps, and Azure OpenAI. You can use this solution to create automated workflows for your specific scenarios. You can also extend this scenario by integrating Azure Cognitive Services for Language into your Logic App workflow.
You can learn more about Azure OpenAI in the resources below:
Learn more about automating document processing with Azure Form Recognizer and Logic Apps:

Written By
I am a Back-End Engineer at NET2GRID in Greece, with an integrated Master's degree in Electrical and Computer Engineering from the Aristotle University of Thessaloniki. I am interested in AI, IoT, Wireless Communications, and Cloud Technologies, as well as in applications of technology in healthcare and education. I am also a Microsoft AI MVP.
The session “Automate Document Processing with Azure Form Recognizer” presented at EMEA Cloud and Modern Workplace Summit 2023.
In this article, you will build an end-to-end document processing solution using Form Recognizer, Logic Apps, and Power BI.

The session “Automate Document Processing with Azure Form Recognizer” presented at Azure for Sure.
The session “Automate Document Processing with Azure Form Recognizer” presented at Global AI Bootcamp Thessaloniki.