Serverless image classification with Azure Functions and Custom Vision – Part 4
In this article, you will deploy a function project to Azure using Visual Studio Code to create a serverless HTTP API.
Azure Custom Vision is an Azure Cognitive Services service that lets you build and deploy your own image classification and object detection models. Image classification models apply labels to an image, while object detection models return the bounding box coordinates in the image where the applied labels can be found.
In this article, we will explore the pre-trained models of Azure Custom Vision service for image classification. We will build and deploy a custom computer vision model for flower classification. You will learn how to:
To complete the exercise, you will need an Azure subscription. If you don’t have one, you can sign up for an Azure free account.
Study the following sketch note to learn how Azure Custom Vision works.

You can find more information and how-to-guides about Custom Vision on Microsoft Learn and Microsoft Docs.
Every machine learning project starts with a question. Our question is, can we identify a flower’s category from an image of a flower, to help document the different types of flowers in our city?
Now that we know what to ask the model, we want to find data that would help us answer the question that we’re interested in. To build and train our machine learning model, we will use the 17 Category Flower Dataset from the Visual Geometry Group (University of Oxford). We will use 3 out of 17 flower categories: Iris, Tigerlily and Tulip. You can download the 3 Category Flower Dataset from my GitHub repository. You can download the full dataset from the Visual Geometry Group’s website.
To use the Custom Vision service, you can either create a Custom Vision resource or a Cognitive Services resource. If you plan to use Custom Vision along with other cognitive services, you can create a Cognitive Services resource.
In this exercise, you will create a Custom Vision resource.
Sign in to the Azure Portal and select Create a resource.
Search for Custom Vision and in the Custom Vision card click Create.
Create a Custom Vision resource with the following settings:

Select Review + Create and wait for deployment to complete.
Once the deployment is complete, select Go to resource. Two Custom Vision resources are provisioned, one for training and one for prediction.
You can build and train your model by using the web portal or the Custom Vision SDKs and your preferred programming language. In this article, I will show you how to build a computer vision model using the Custom Vision web portal.
Navigate to the Custom Vision portal and sign in.
Create a new project with the following settings:

Select Create project.
In your Custom Vision project, select Add images.
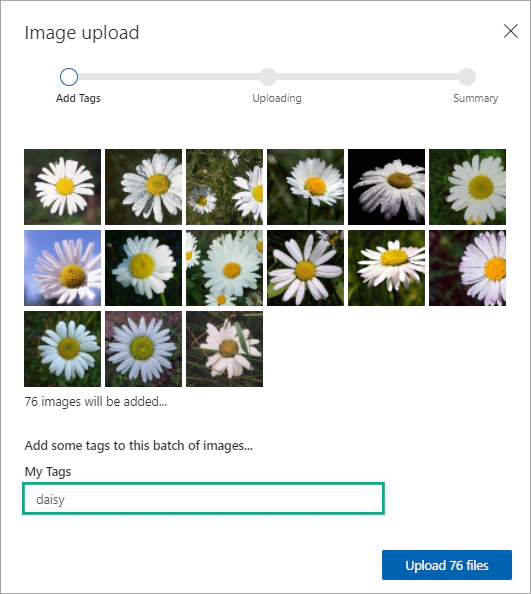
Select all the images in the Daisy folder you extracted previously. Then upload the image files and specify the tag daisy.
Repeat the previous step to upload the images in the Iris and Tigerlily folders with the tags iris and tigerlily, respectively.
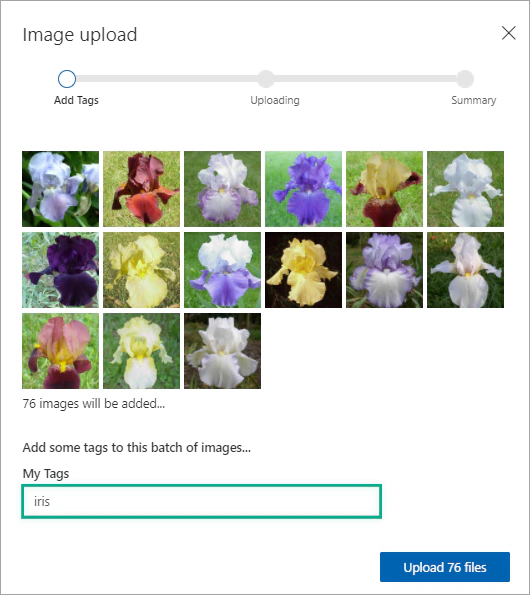
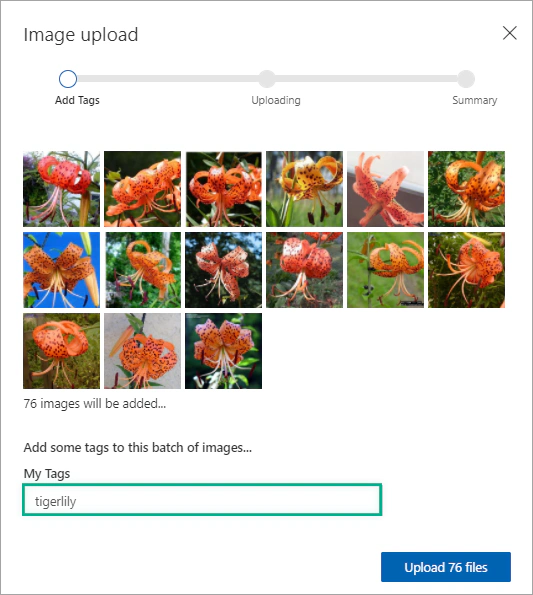
Explore the images that you have uploaded. There should be 76 images of each flower category.
In the top menu bar, click the Train button to train the model using the tagged images.
Then, in the Choose Training Type window, select Quick Training and wait for the training iteration to complete.

When the training finishes, information about the model’s performance is estimated and displayed.

The Custom Vision service calculates three metrics:
Before publishing our model, let’s test it and see how it performs on new data. We will use the flower images in the Test folder you extracted previously.
In the top menu bar, select Quick Test.
In the Quick Test window, click the Browse local files button and select a local image. The prediction is shown in the window.


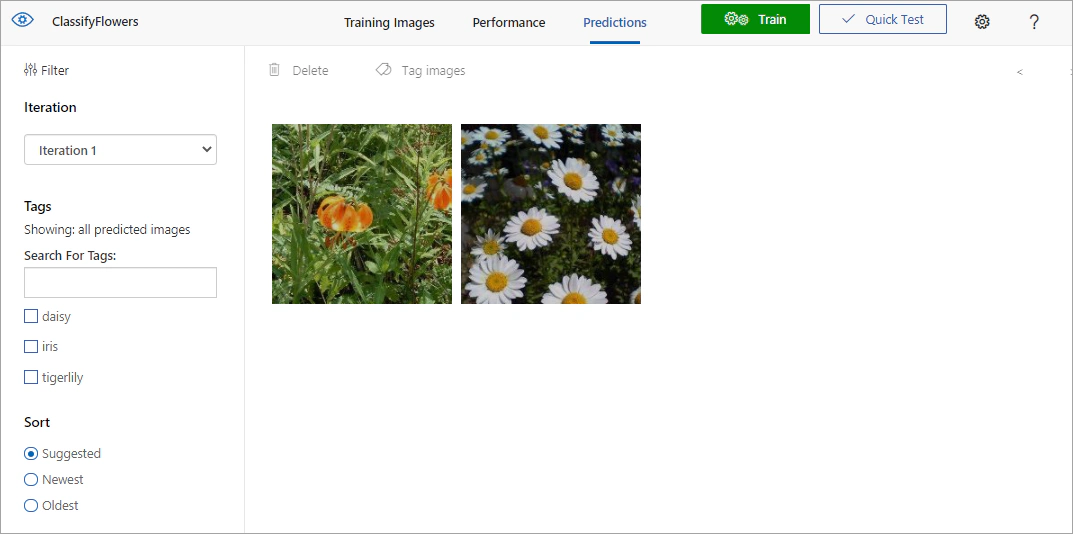
The images that you uploaded appear in the Predictions tab. You can add these images to your model and then retrain your model.
Once your model is performing at a satisfactory level, you can deploy it.
In the Performance tab, select Publish.

In the Publish Model window, under Prediction resource, select the name of your Custom Vision prediction resource and then click Publish.

Once your model has been successfully published, you’ll see a Published label appear next to your iteration name in the left sidebar.
In the Custom Vision portal, click the settings icon (⚙) at the top toolbar to view the project settings. Then, under General, copy the Project ID.

Navigate to the Custom Vision portal homepage and select the settings icon (⚙) at the top right. Expand your prediction resource and save the Key and the Endpoint, because you will need these values to build the Python app.

To create an image classification app with Custom Vision for Python, you’ll need to install the Custom Vision client library. Install the Azure Cognitive Services Custom Vision SDK for Python package with pip:
| |
Then, use the following code to call the prediction API in Python (code source: Microsoft Docs – Python Quickstart).
| |
Replace <YOUR_PROJECT_ID>, <YOUR_KEY> and <YOUR_ENDPOINT> with the ID of your project, the Key and the Endpoint of your prediction resource, respectively.
Use the following code to display the predicted class of all the images in the Test folder:
| |
In this article, you learned how to use Azure Custom Vision service to create an image classification model. In the next article, you will build an object detection model!
If you have finished learning, you can delete the resource group from your Azure subscription:
In the Azure Portal, select Resource groups on the right menu and then select the resource group that you have created.
Click Delete resource group.

Written By
I am a Back-End Engineer at NET2GRID in Greece, with an integrated Master's degree in Electrical and Computer Engineering from the Aristotle University of Thessaloniki. I am interested in AI, IoT, Wireless Communications, and Cloud Technologies, as well as in applications of technology in healthcare and education. I am also a Microsoft AI MVP.
In this article, you will deploy a function project to Azure using Visual Studio Code to create a serverless HTTP API.
In this article, you will create a Python Azure Function with HTTP trigger to consume a TensorFlow machine learning model.
This article will show you how to export your classifier using the Custom Vision SDK for Python and use the model to classify images.
In the first article of this series, you will build and deploy an image classification model using the Custom Vision SDK for Python.