Vector search on Azure Database for PostgreSQL with the Azure AI extension
Learn how to enable the Azure AI extension and generate vector embeddings with Azure OpenAI on Azure Database for PostgreSQL Flexible Server.
Have you ever wondered how games can transform the way we learn? For me, the idea of blending creativity, technology, and a touch of fun has always been fascinating. Recently, I had the chance to explore this by building an educational visual novel game. Although I had no prior experience in game development, I was eager to try something new, so I took my first steps with Ren’Py, a visual novel engine built on Python. Using AI tools to speed up development and Azure Static Web Apps for deployment, I created a prototype for an interactive game that teaches you how to use GitHub Copilot to assist with coding tasks. Since it was December, I added a festive touch to the game to make the experience more fun.
In this post, I’ll share how I:
Curious to see the result? You can play the game online and find the source code at my GitHub repository.
There are several educational games about cloud technologies, covering everything from beginner to advanced users. For example, Microsoft offers Microsoft Technical Quest, a card-based game where you build a reference architecture using Azure services. Other cloud providers, like AWS, also have game-based training to help you learn how to build cloud solutions in a fun, gamified way.
A few years ago, I played a game called Azure Space Mystery, created by Microsoft Cloud Advocates for the International Day for Women and Girls in Science. It was a text-based game with rich graphics that included questions to move to the next level. The idea was to bring Microsoft Learn content closer to developers in a fun way.
I wanted to try building something similar, even though I had no experience in game development. My idea was to create a text-based game that teaches a technical concept, provides short quizzes, and rewards players with achievements as they progress. Since GitHub Copilot has been getting so much attention lately, I decided to make it the main focus of the game. Because I started working on the game in December, I also added a festive theme.
The result was Christmas Copilot Quest, a game where players learn how to use GitHub Copilot in Visual Studio Code to help with coding tasks. Guided by GingerBot, Santa’s friendly Copilot-powered assistant, players are introduced to the features of GitHub Copilot in an interactive way.

There are many great tools for building text-based games, but I had a few key requirements in mind:
Since Python is my go-to language, I was naturally drawn to Ren’Py, a visual novel engine built on Python. It met all my requirements, offering an easy-to-use scripting language for writing the story, defining quizzes, and customizing the UI. It also provides the flexibility to extend its built-in functionality using Python and export the game to desktop, mobile, and web platforms. Additionally, the availability of the Ren’Py Command Line Interface (CLI) allowed me to automate the process of building and deploying the game.
The game is built around three core components:
Script: This includes the game’s story and quizzes. The narrative can take the form of monologues or dialogues between characters. The story is organized into sections identified by labels.

Graphical User Interface (GUI): This covers the screens and menus displayed throughout the game as well as the visual elements used. Ren’Py scripting language allows for both the customization of built-in screens (e.g., buttons and menus) and the creation of new ones, such as:

Custom Python code: This provides additional functionality tailored to the game’s needs. The latest version of Ren’Py supports scripting custom components using Python 3.9. Custom components in the game include:
To keep the game maintainable and extensible, these components were kept separate. The script defines the story, while the logic is organized into Python modules, which are called stores in Ren’Py. For example, a Python function that determines the player’s name based on their input can be called directly from the script as follows:
| |
I found GitHub Copilot very helpful for navigating and understanding Ren’Py, a framework I had never worked with before. Although Ren’Py is not a widely used framework, and likely has limited data available for training, GitHub Copilot correctly answered most of my questions and helped me understand how various Ren’Py components work. One example was its suggestion for implementing a character selection screen with image buttons.
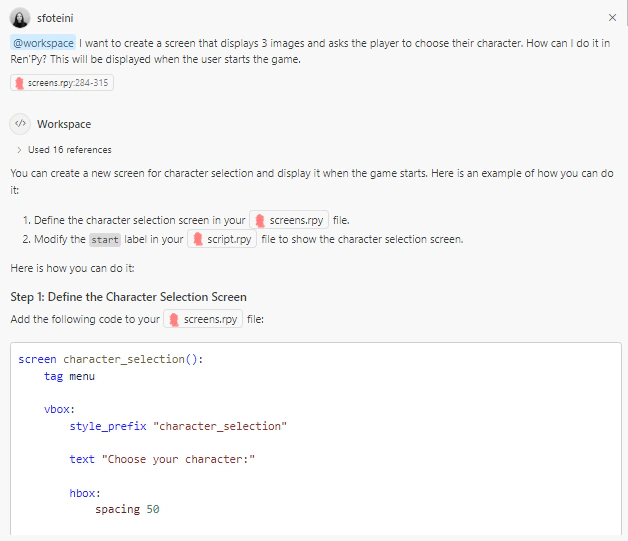
The suggestion was quite accurate and provided a solid starting point, allowing me to quickly develop the screen. However, Copilot did not provide a correct implementation for adding a hover transition to the buttons of the screen. This was somewhat expected, given that Ren’Py is not a widely used language.
I wanted to create a simple game quickly, so I didn’t have the time to design all the graphics myself. I used AI-powered image generation tools to create the characters and background images used in the game. My key requirements were consistent style across all images and a festive theme.
I started with the DALL-E 3 model, available through the Azure OpenAI Service. While the images were decent, I found it challenging to keep a consistent style across all images.
Then, I switched to Microsoft Designer, an AI-powered cloud-based graphic design application by Microsoft. This gave me more consistent results across different requests, making it a better fit for my needs. For character creation, I used the avatar text-to-image feature, and for the backgrounds, I used the default one. After experimenting with several styles, I settled on a “low poly” aesthetic because it delivered both consistent results and a look that matched the game’s playful, gamified nature. Here’s an example of a prompt I used to generate a character image:
“Low-poly 3D portrait of a stylized woman with brown hair, wearing a blouse in christmas colors, featuring clean geometric shapes, flat colors, and soft lighting, in a minimalist futuristic style with white background.”
The generated images were processed by applying filters to reduce noise, smooth the colors, remove the background, and highlight the edges of the polygons. In some cases, I combined two images to create the final character design and generated duplicates with closed eyes to produce the eye blinking effect in the game.
Overall, I found these tools extremely helpful for quickly generating visual assets. While I created hundreds of versions for each character (okay, maybe I’m a bit of a perfectionist!), AI tools were invaluable for generating images that aligned with the game’s theme.
In this post, we explored how Ren’Py, a visual novel engine built on Python, and AI tools such as GitHub Copilot, Azure OpenAI Service, and Microsoft Designer can be used to create a prototype for an educational game. But what’s next? Now, we need to deploy the app. Fortunately, Ren’Py offers a CLI tool to automate game builds, and Azure Static Web Apps integrates seamlessly with GitHub Actions. In the next post, I’ll show you how I set up a GitHub Actions workflow to automate the build and deployment process for the game.
In the meantime, you can check out the following resources to learn more about GitHub Copilot and the DALL-E 3 model:

Learn how to enable the Azure AI extension and generate vector embeddings with Azure OpenAI on Azure Database for PostgreSQL Flexible Server.
Explore how I use GitHub Copilot in my daily development workflow and discover features you may not have come across yet.
This guide provides essential study resources, courses, and tips to help you prepare and pass the Microsoft AI-102 exam.
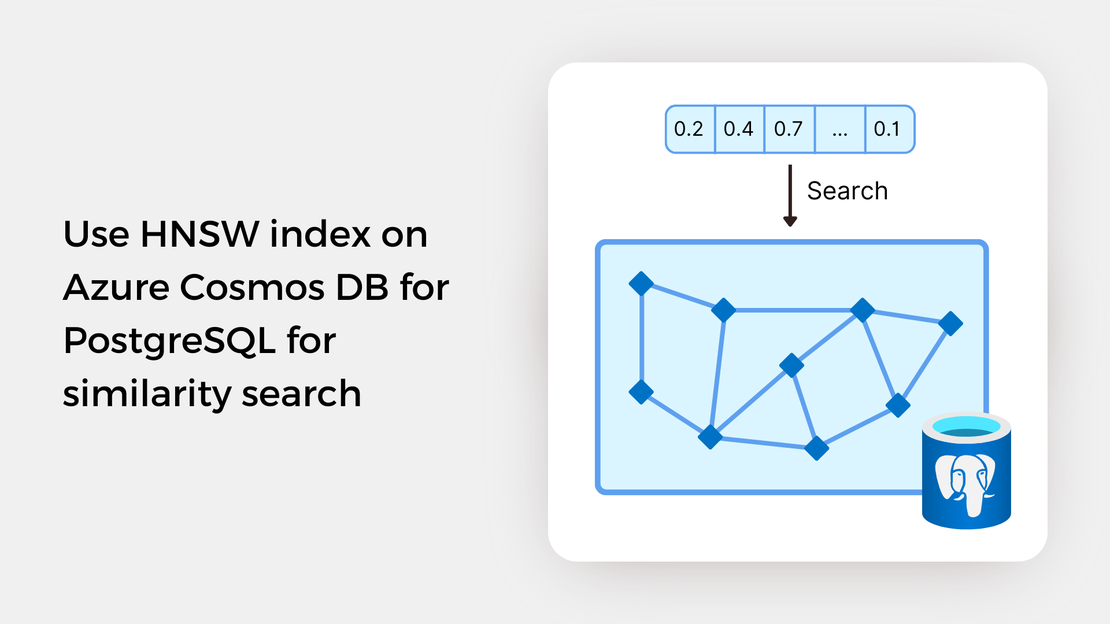
Explore vector similarity search using the Hierarchical Navigable Small World (HNSW) index of pgvector on Azure Cosmos DB for PostgreSQL.