Deploy a WordPress site to Azure App Service
In this article, you will learn how to deploy your WordPress website to Azure App Service on Linux using the Azure portal.
In the third part of “Host WordPress on Microsoft Azure” tutorial series, you will use the FTP deployment credentials to connect to your WordPress app.
To complete the exercise, you will need:
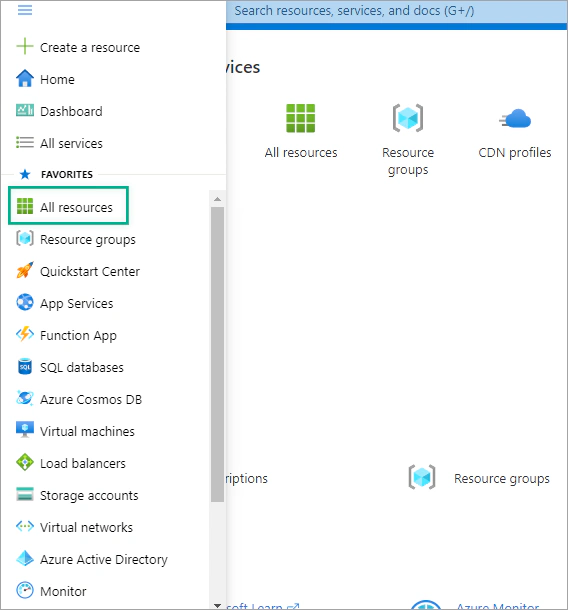
Sign in to Azure Portal, expand the left navigation panel and select All resources.
Select the App Service that you have created in the part 1.
Then navigate to Deployment > Deployment Center and select Deployment Credentials.
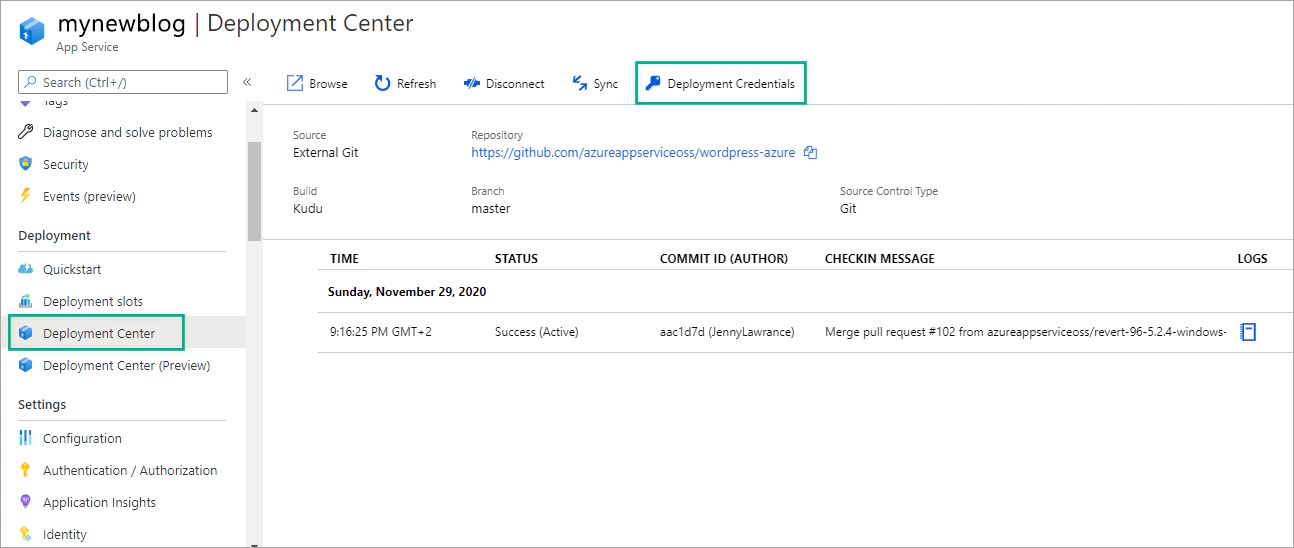
In Deployment Credentials tab, select App Credentials and save the following information:
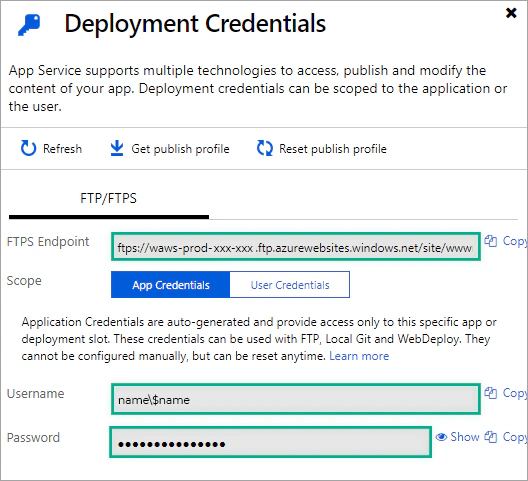
From your FTP client (for example, WinSCP), use the connection information you gathered to connect to your WordPress app.
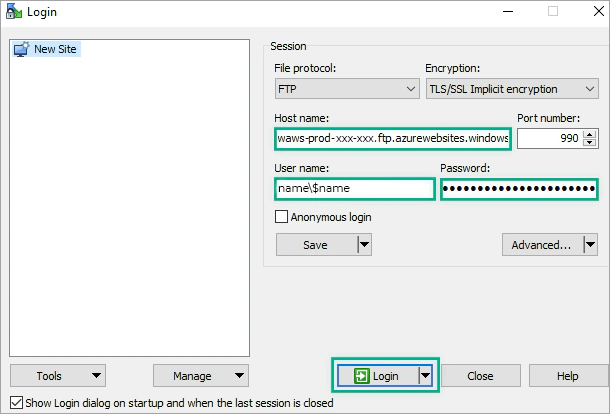
After connection, you will be able to see the app files and upload or download files via drag&drop.
In the following tutorials, you will learn how to add a custom domain to your website and an SSL certificate using the free App Service Managed Certificate.

In this article, you will learn how to deploy your WordPress website to Azure App Service on Linux using the Azure portal.
In the last tutorial of “Host WordPress on Microsoft Azure” series, you will protect your domain with a free App Service Managed Certificate.
In the fourth tutorial of “Host WordPress on Microsoft Azure” series, you will learn how to map a custom domain name to your website.
In second part of “Host WordPress on Microsoft Azure” tutorial series, you will learn how to update the PHP version via the Azure Cloud Shell.