Empowering patients and healthcare organizations through Azure AI Services
The session “Empowering patients and healthcare organizations through Azure AI Services” presented at the Boston Healthcare User Group.
In this article, you will build your first intelligent, AI-powered, medical chatbot using Azure Health Bot. You will learn how to:
To complete the exercise, you will need:
Sign in to Azure Portal and search for Azure Health Bot.
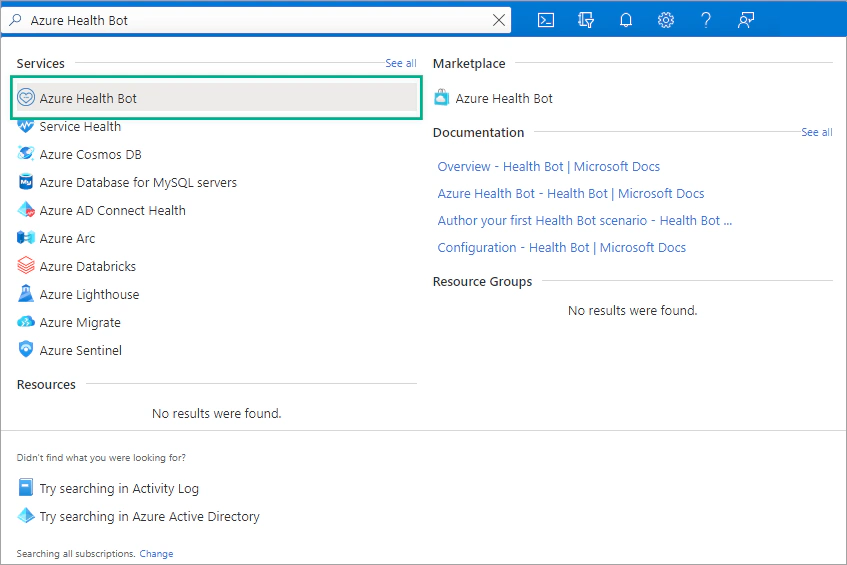
Then select Create to start.
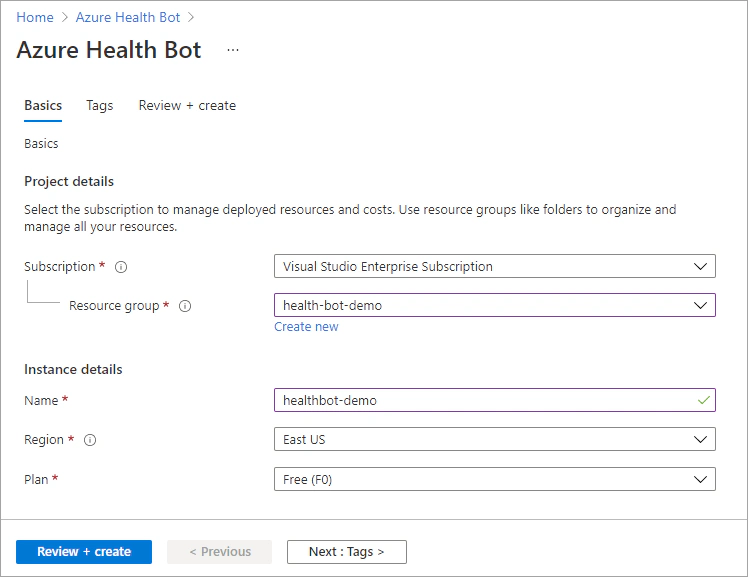
Configure the new resource. Select subscription, resource group, name, region (for example, East US) and plan. You can start with the Free (F0) plan and select another plan later. Then click Review + Create.
Wait for the deployment to be complete (it may take several minutes) and then select Go to resource.
Click on the Management portal link to go to your Azure Health Bot management portal.
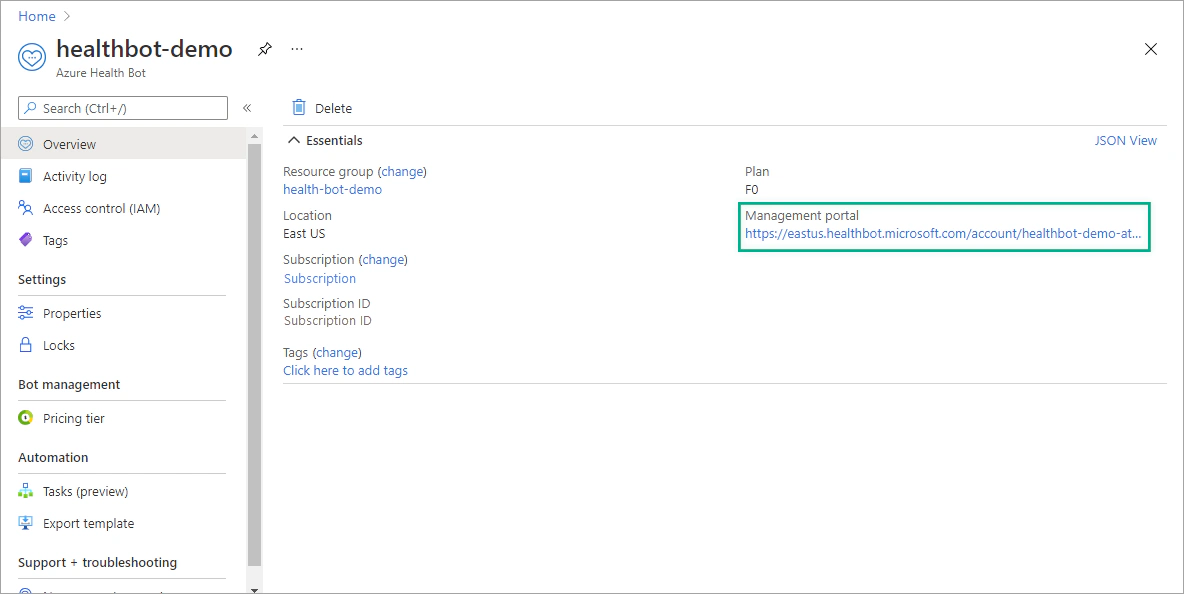
Before extending our bot, let’s explore the available features of our health bot instance.
Built-in scenarios are prebuilt scenarios that are available to your users. They perform important tasks, such as triaging and symptom checking, answering questions or providing information about medical conditions and symptoms or types of drugs. Additionally, the Azure Health Bot provides a few built-in commands that may help you interact with your bot. You can try the built-in capabilities of your bot using the web chat.
In the upper menu, select the chat icon.
Use some of the following phrases to trigger different built-in scenarios:
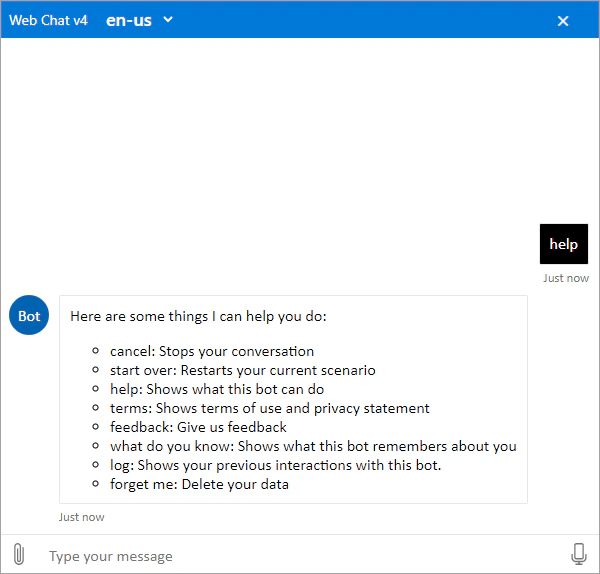
Type Help to see all the available built-in commands.
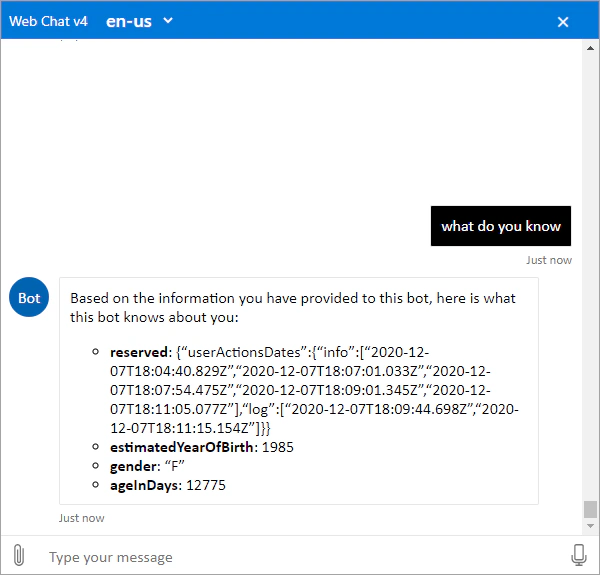
Type What do you know to see what the bot has learned about you.
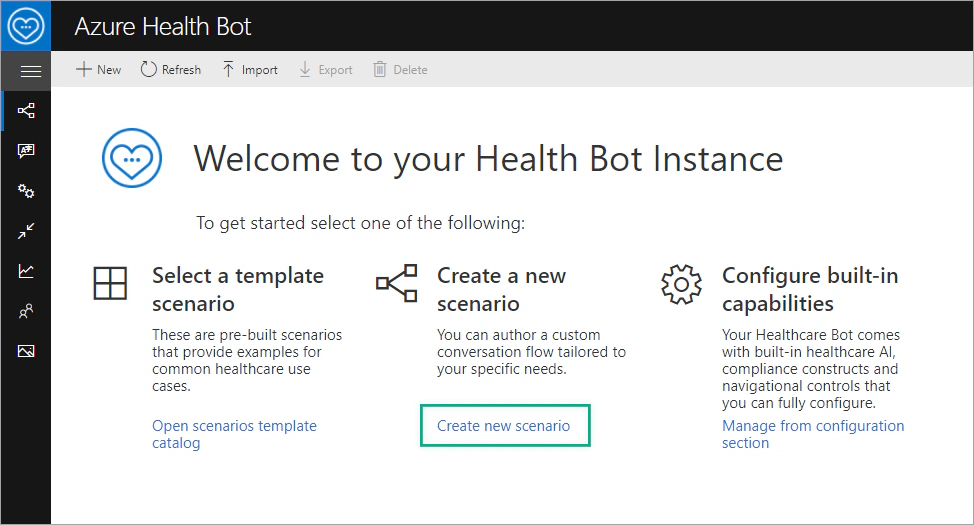
You can extend your bot by authoring your own scenarios. To create a new scenario, navigate to the Scenarios tab and click Create new scenario. You can build your scenarios using a drag-and-drop visual interface called Designer or using code. In the next article, you will learn how to create a custom scenario for mental health screening.
The Web Chat is a web application that the end users can use to communicate with your Azure Health Bot instance. The web chat channel is enabled by default. Additional channels can be enabled for your bot through the Health Bot management portal. Learn more about how to connect your bot to channels.
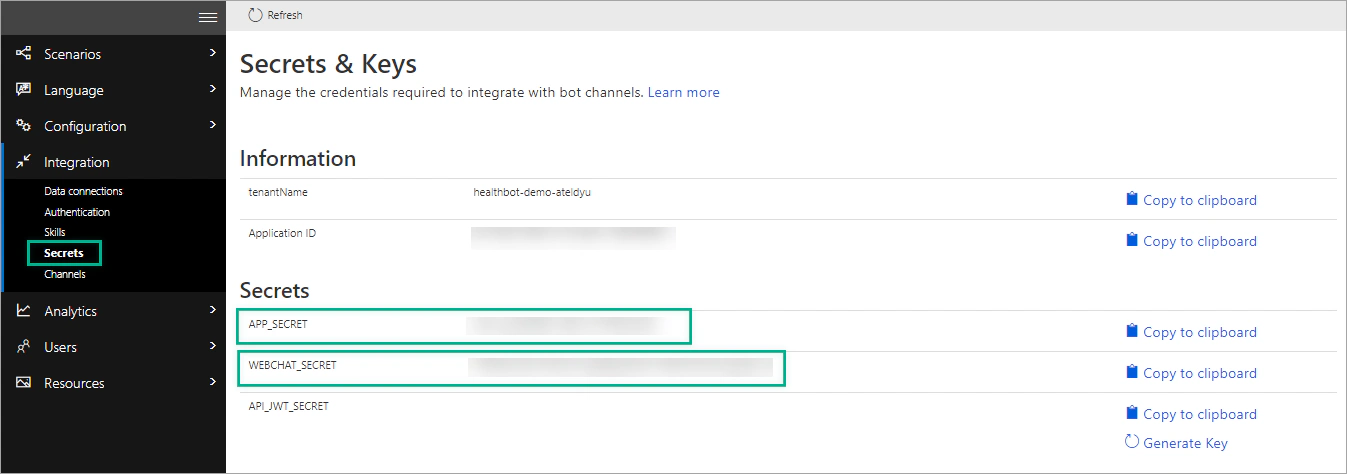
In the Health Bot management portal, navigate to Integration > Secrets. Copy the APP_SECRET and the WEBCHAT_SECRET.
Go to the Health Bot Container GitHub repository and select Deploy to Azure.
Provide the details required to provision the new web app.
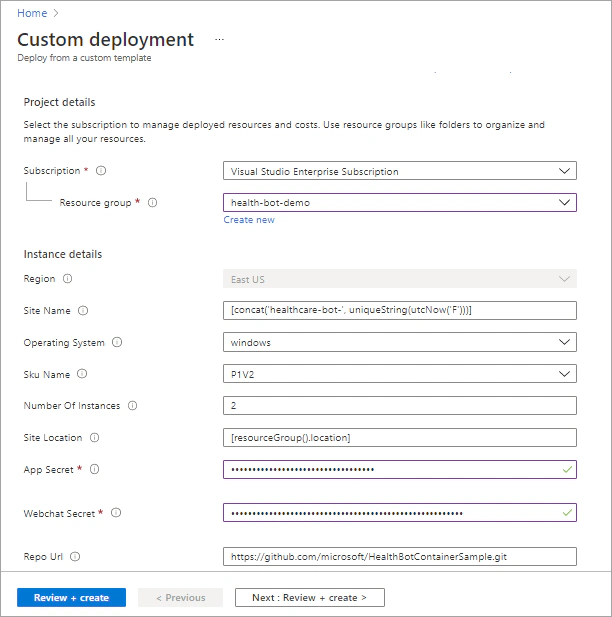
Click Review + Create. Once the deployment is complete, select Go to resource group.
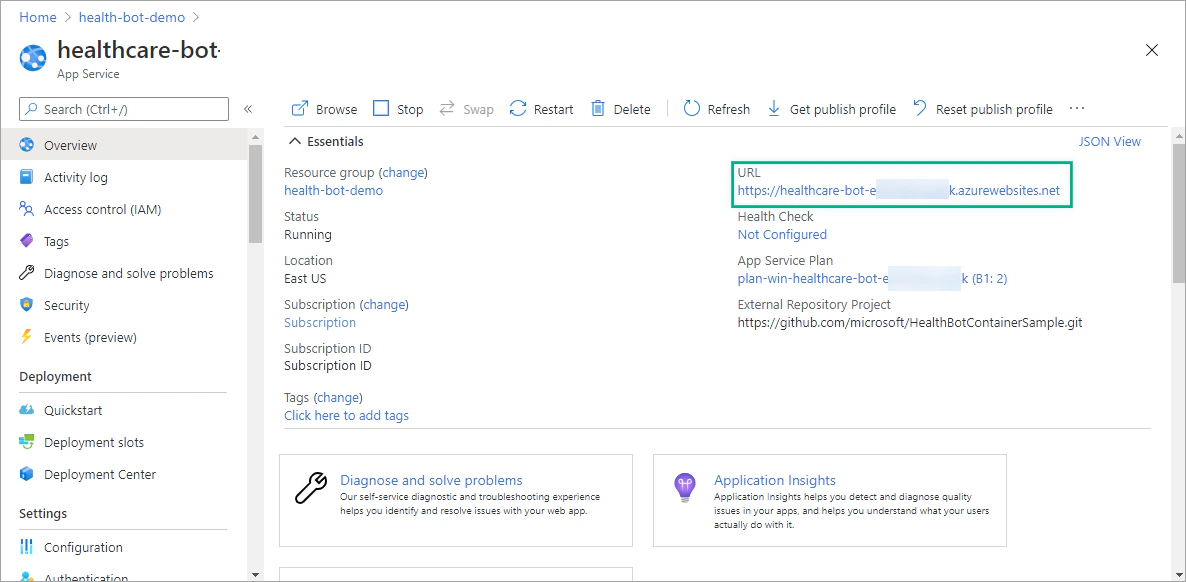
Two new services have been created in the resource group: an App Service and an App Service Plan. Select the App Service and then open the URL to test the deployed web chat.
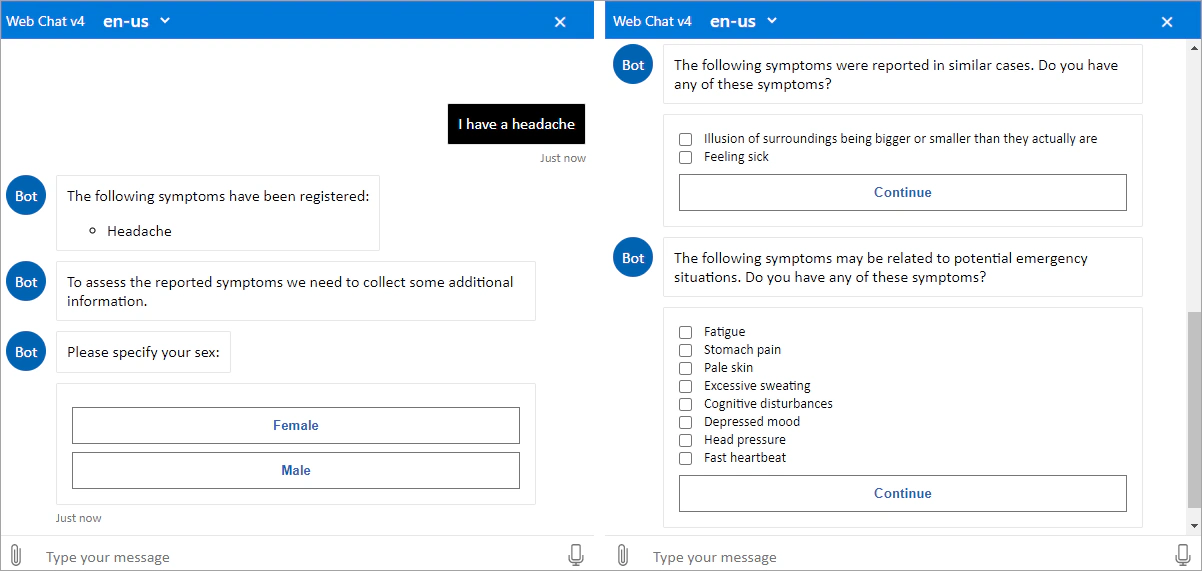
Type “I have a headache” to trigger the triage and symptom checking scenario.
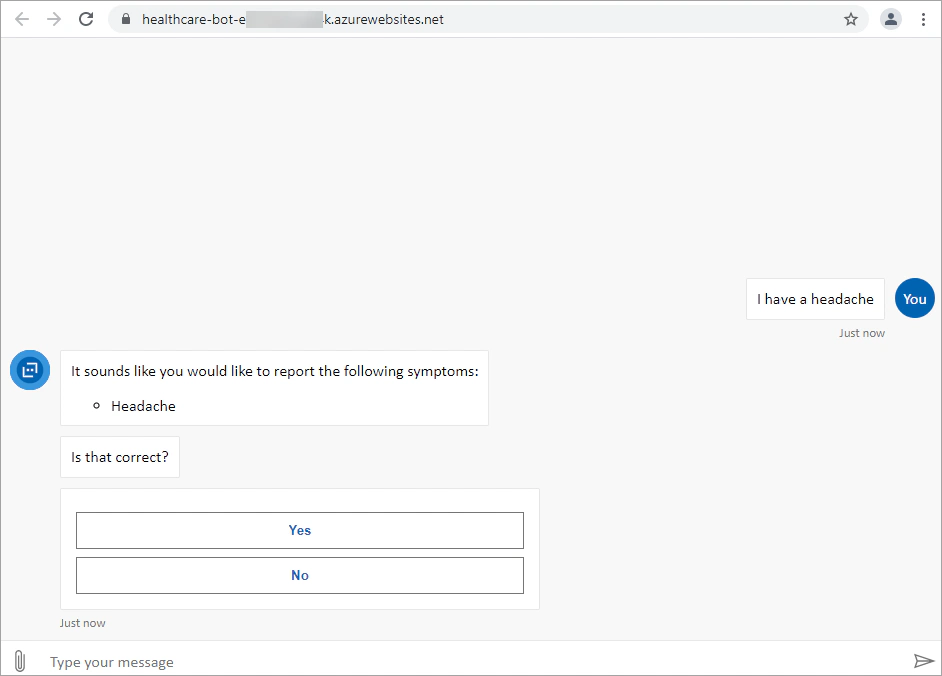
You can use the deployed web page to embed the web chat in your website.
Download the website-template from my GitHub repository or use your own website.
Open the file in Visual Studio Code and embed the web chat in your website using an iFrame.
| |
Navigate to the website and see the web chat.
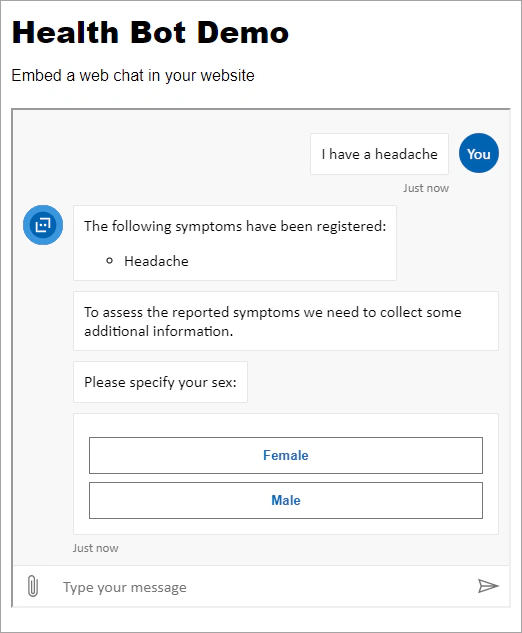
In this article, you explored the capabilities of Azure Health Bot and learned how to create your own Health Bot instance and deploy the Web Chat channel. In the next article, you will learn how to create a custom scenario for mental health screening and a language model.
If you have finished exploring Azure Health Bot, you can delete your health bot instance and associated resources.

The session “Empowering patients and healthcare organizations through Azure AI Services” presented at the Boston Healthcare User Group.
In this article, you will learn how to author a custom scenario for mental health screening in Azure Health Bot and create a language model.
The session “Using scenarios and language understanding in Azure Health Bot” with Einat Gruda Idelovitch, Foteini Savvidou and Nihal Dias.
In this tutorial, you will create a classification model for chronic kidney disease prediction in Azure Machine Learning Designer.