Insert data from file in Azure Database for MySQL
In this tutorial, you will use SQL statements to manipulate data in Azure Database for MySQL and learn how to open files in Python.
In this tutorial series, you will learn how to create an Azure Database for MySQL and connect to the database by using Python. Then you will use Python and SQL statements to insert, read, select, order, update, and delete data in the database.
In the first part of this tutorial series, you will learn how to create an Azure Database for MySQL single server via the Azure Portal, create a new database and configure firewall rules to enable connectivity. To complete the exercise, you will need an Azure subscription.
Sign in to Azure Portal and search for Azure Database for MySQL.
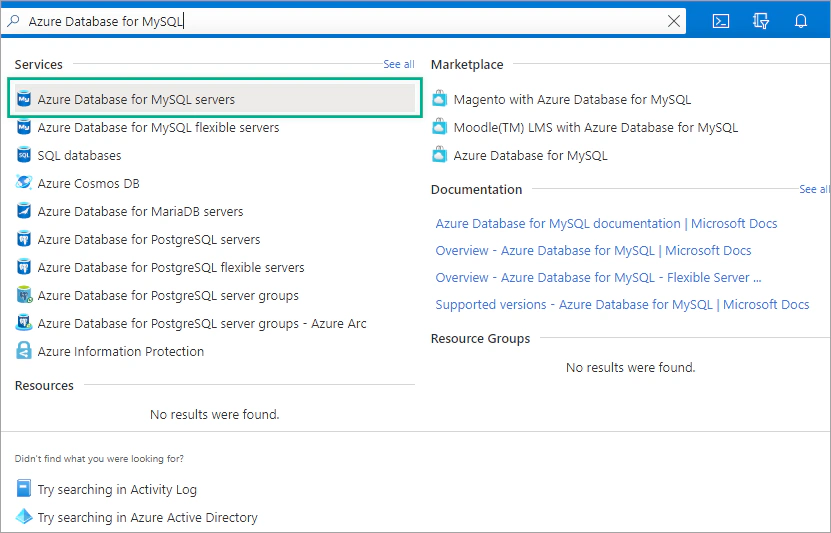
In the new tab, select Add.
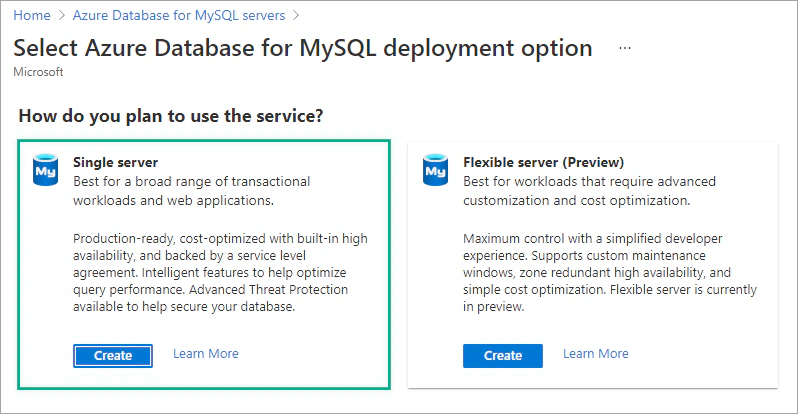
In the Select Azure Database for MySQL deployment option window, select Single Server.
Then, configure the new database. Select:
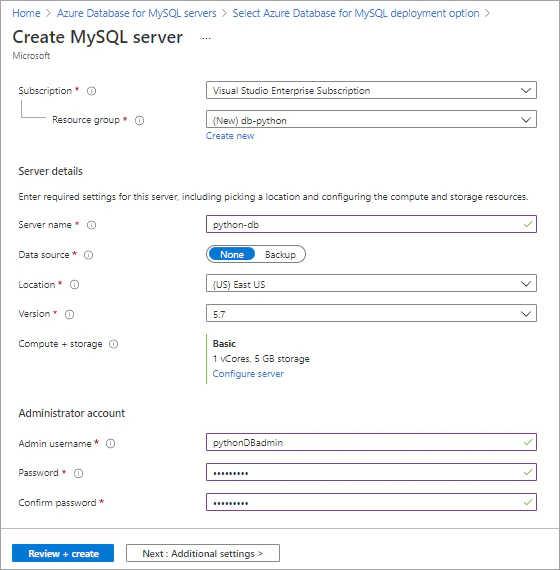
Select Review + create and wait for the server to be created (it may take several minutes). Once the deployment is complete, select Go to resource.
On the MySQL server page, click Connection security in the left pane.
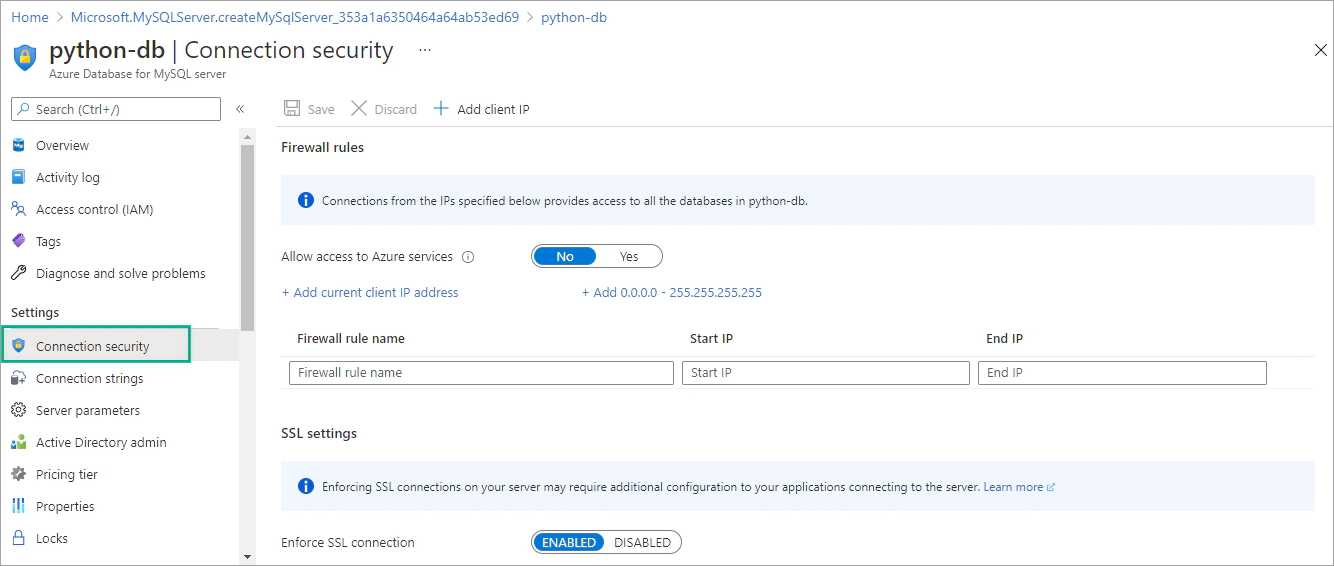
Select Add client IP on the top toolbar and click Save to save this server-level firewall rule. (Before saving the configuration, verify your IP address.)
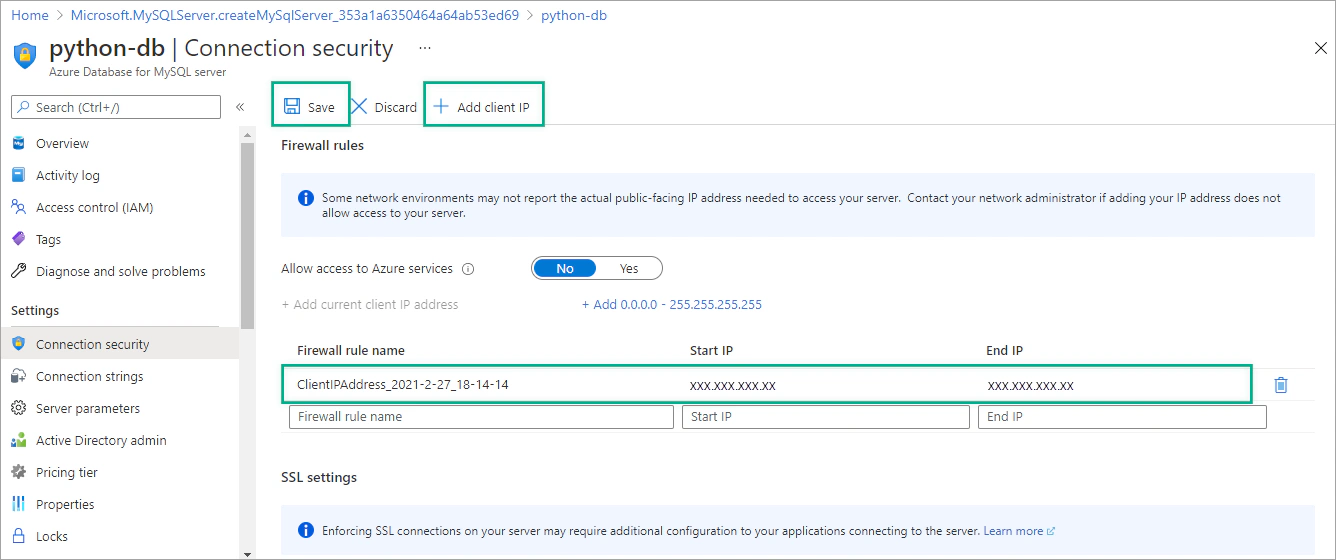
Activate the Allow access to Azure services option.
Select the Azure Cloud Shell button on the top toolbar.
If you are opening Azure Cloud Shell for the first time, you should choose your preferred shell experience and create a storage account.
Run the following command in the terminal to connect to the server:
| |
where
server is the name of your server.username is your admin username.Enter your password. If you have successfully connected to the server, you will see the following statement in the terminal:
| |
Run the following SQL code to create a new database named demodb.
| |
Enter quit to quit mysql.
In the next tutorial, you will use Python and Visual Studio Code to connect to your database.

In this tutorial, you will use SQL statements to manipulate data in Azure Database for MySQL and learn how to open files in Python.
This tutorial will show you how to use Python to create tables and manipulate data in Azure Database for MySQL.
In this tutorial, you will learn how to connect to your Azure Database for MySQL using Python and Visual Studio Code.
This tutorial will show you how to manipulate and query data in an Azure SQL database using Python and Jupyter Notebooks.