Manipulate data in Azure SQL Database using Python and Jupyter Notebook
This tutorial will show you how to manipulate and query data in an Azure SQL database using Python and Jupyter Notebooks.
In this “Azure SQL Database and Python” tutorial series, you will learn how to create an Azure SQL Database and connect to the database by using Python. Then you will use Python and SQL statements in Jupyter Notebooks to create tables and manipulate data.
In the first part, you will learn how to create an Azure SQL Database via the Azure Portal and configure firewall rules to enable connectivity. To complete the exercise, you will need an Azure subscription.
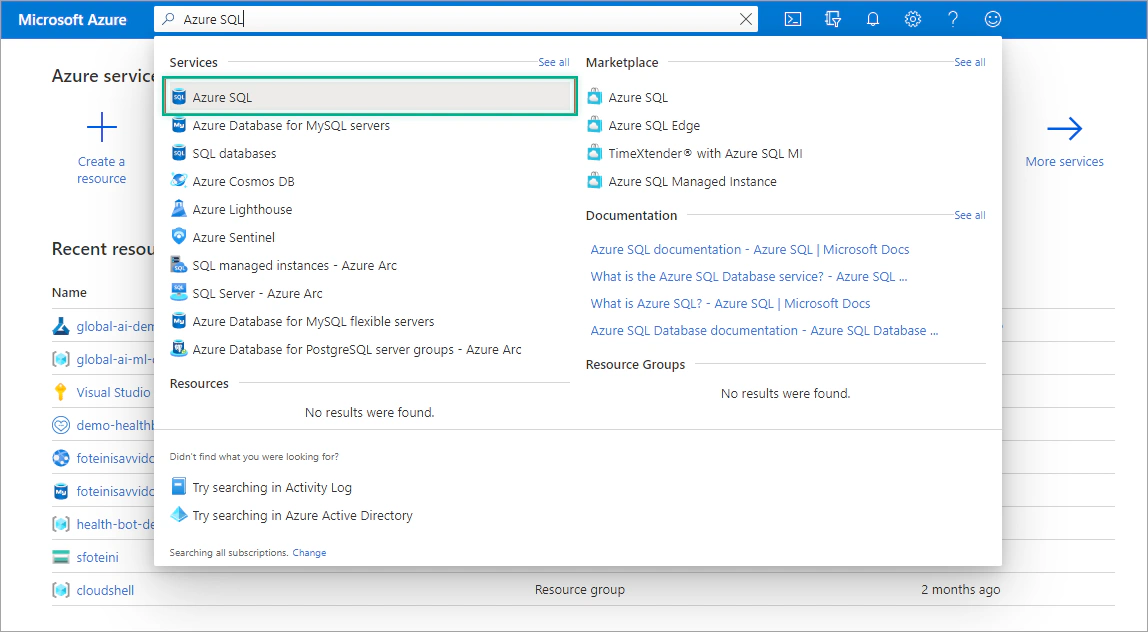
Sign in to Azure Portal and search for Azure SQL.
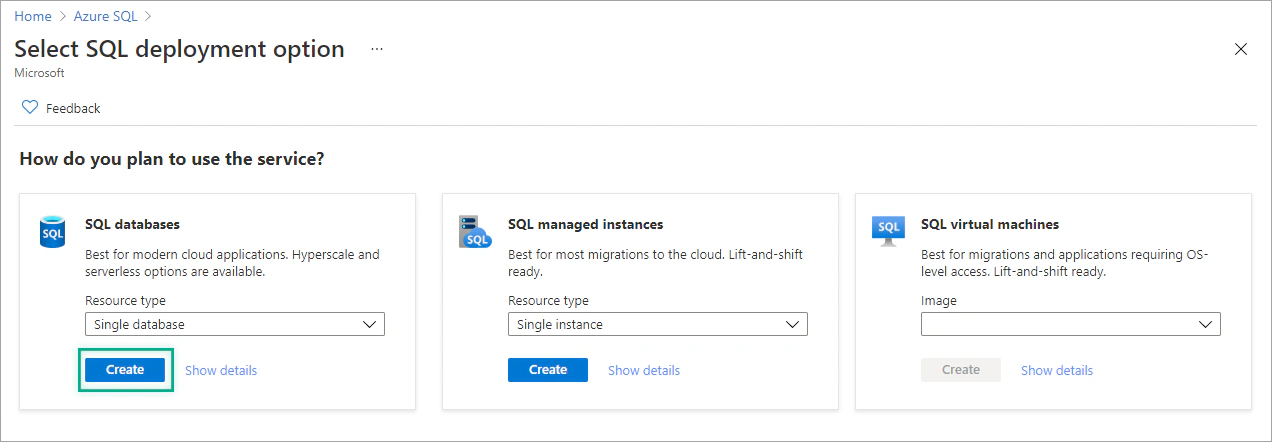
In the new tab, select Add.
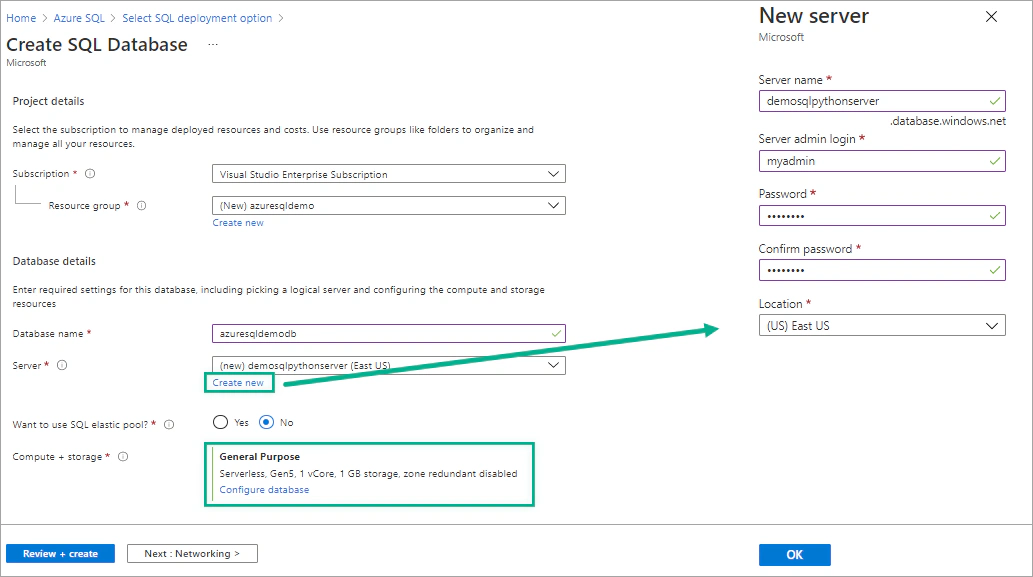
In the Select SQL deployment option window, select SQL Database > Single Database.
Then, configure the new database. Select:
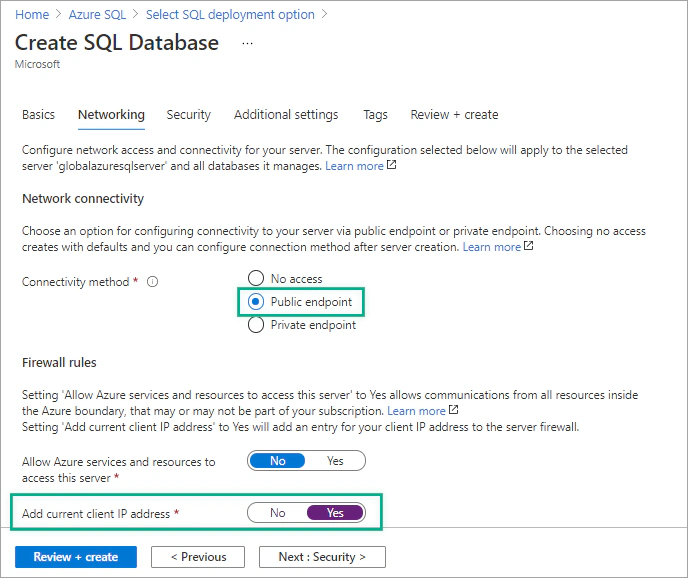
Select the Networking tab. Under Connectivity method, select Public endpoint and the set the Add current client IP address option to Yes.
At the bottom of the page select Review + create and wait for the server to be created (it may take several minutes). Once the deployment is complete, select Go to resource.
In the next tutorials, you will use Python and Jupyter Notebooks in Visual Studio Code to connect to your database and execute SQL statements to create and populate tables with data, manipulate and query data and run aggregate functions.

This tutorial will show you how to manipulate and query data in an Azure SQL database using Python and Jupyter Notebooks.
In this tutorial, you will learn how to use Python and Jupyter Notebooks to insert a dataframe into an Azure SQL table.
In this tutorial, you will learn how to use Python and Jupyter Notebooks to connect to an Azure SQL Database.

The session “Azure SQL Database: Use Python to manipulate data” at Global Azure Greece 2021 by Foteini Savvidou.