Build an AI web app with Azure Cognitive Services and Flask
In this blog post, you will build a website using Flask and Azure Cognitive Services to extract and translate text from notes.
Welcome to part 4 of the “Digitize and translate your notes with Azure Cognitive Services and Python” series. In the previous posts, you explored the READ API and the Translator service and created a Flask web app that extracts and translates handwritten notes.
To find out more about previous posts, check out the links below:
In this blog post, you will deploy your Flask web app to Azure. You will learn how to:
To complete the exercise, you will need to install:
To host your application in Azure, you need to create an Azure App Service web app.
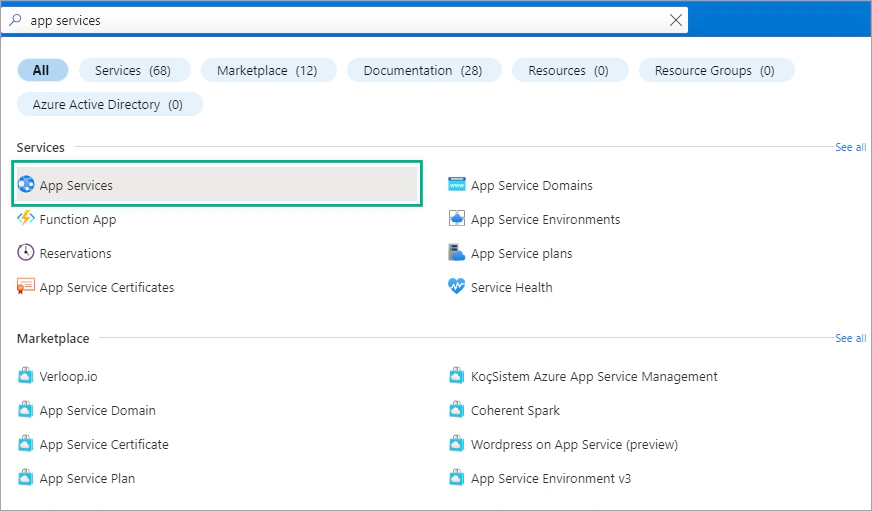
Sign in to the Azure Portal and search for App Service and select App Services.
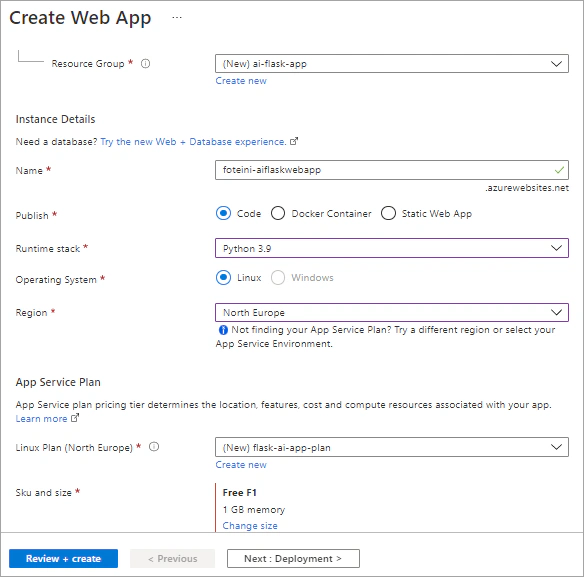
Create a new App Service resource with the following settings:
Select Review + Create and wait for deployment to complete.
Once the deployment is complete, select Go to resource.
In the previous article, we stored the Key and Endpoint of our Cognitive Service resource in an .env file. In App Service, we can define our keys and endpoint in App Settings and access them as environment variables.
In the Azure portal, navigate to your web app and select Configuration under Settings on the left pane.
Under Application settings, select + New application setting.
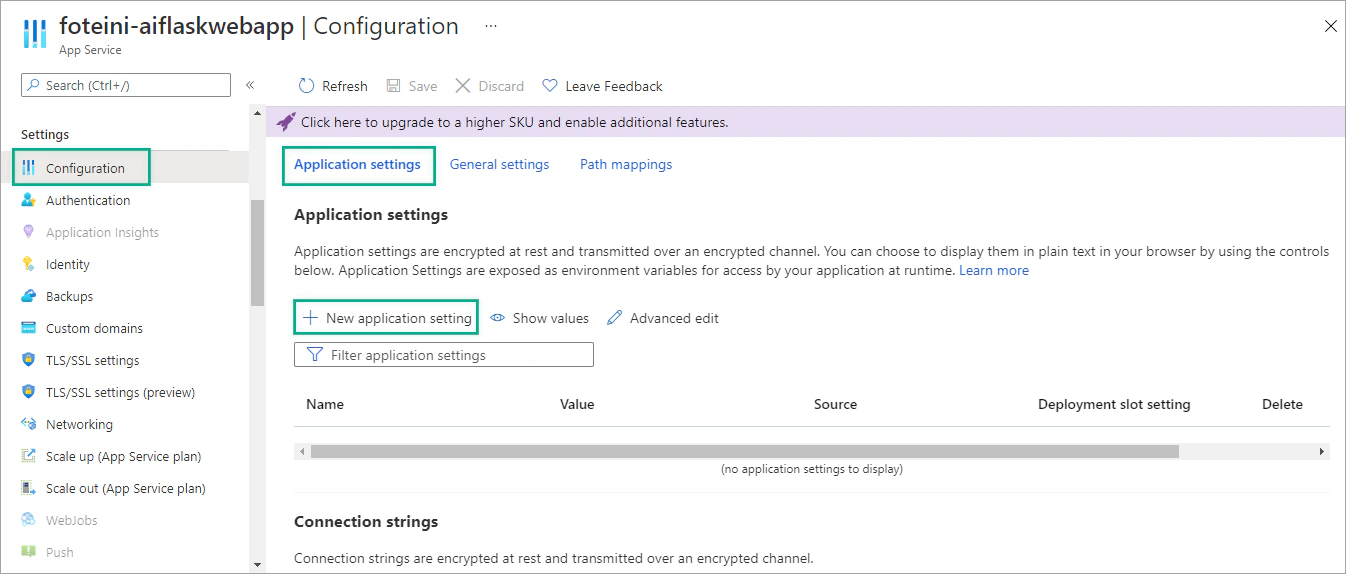
Create four environment variables named COG_SERVICE_KEY, COG_SERVICE_REGION, COG_SERVICE_ENDPOINT and ENDPOINT and click Save to apply the settings.
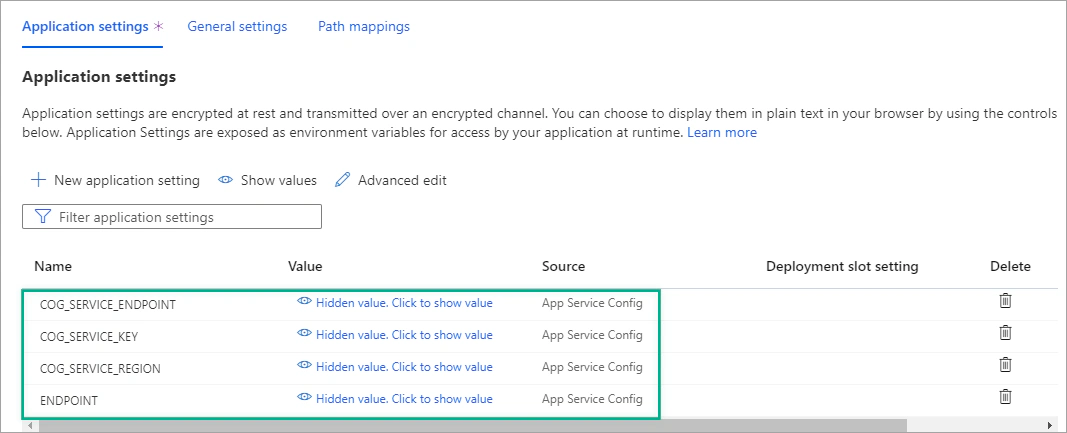
The above application settings are available to your app code as environment variables and accessed using os.environ.
Open the app.py file from the previous article.
Modify the code as follows:
| |
Delete the .env file and any unnecessary lines of code.
Before deploying your app, create a requirements.txt in your app’s folder and add the following libraries.
| |
You can download the sample application from my GitHub repository.
There are multiple methods to deploy your Python apps to Azure App Service. In this article, I’ll show you how to deploy your application code to Azure using Visual Studio Code.
In Visual Studio Code, open your web app’s folder.
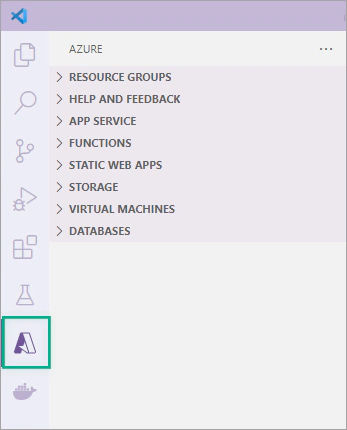
Then, select the Azure icon on the left pane.
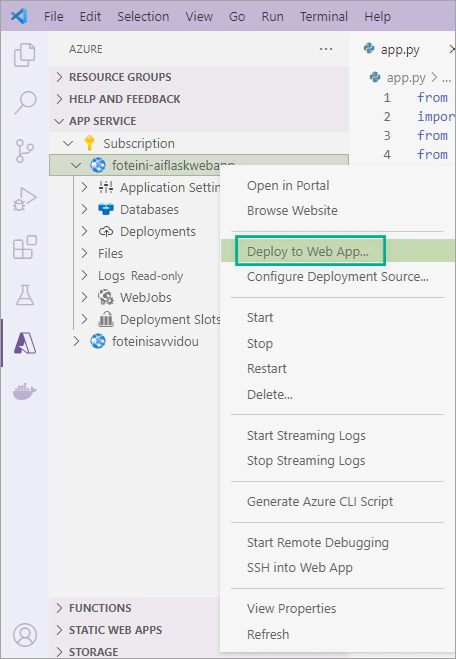
Under App Service, find your web app. Right-click the web app and select Deploy to Web App.
Select your web app’s folder and then click Deploy.
Once the deployment is complete, navigate to https://<app-name>.azurewebsites.net and submit an image for translation to test your app.
Congratulations! You have deployed your Flask app to Azure App Service.
In the “Digitize and translate your notes with Azure Cognitive Services and Python” series you learned how to build an intelligent web app using Flask and Azure Cognitive Services. You learned how to:
Now that you learned how to build and deploy a web app to Azure, you can enhance your app or develop a new “intelligent” app.
Check out the other parts of the “Digitize and translate your notes with Azure Cognitive Services and Python” series:
If you have finished learning, you can delete the resource group from your Azure subscription:
In the Azure Portal, select Resource groups on the right menu and then select the resource group that you have created.
Click Delete resource group.
🎓 Thank you for joining me in this four-part series. I hope you enjoyed the journey and learned new skills!

In this blog post, you will build a website using Flask and Azure Cognitive Services to extract and translate text from notes.
This post will take you through the newest Read OCR API of Azure Computer Vision, which is used for extracting text from images.
In this post, you will explore the latest features of Azure Computer Vision and create a basic image analysis app.
In this article, you will build a simple Python app that translates text using the Azure Translator service.