Predict the risk of chronic kidney disease with Azure Machine Learning
In this tutorial, you will create a classification model for chronic kidney disease prediction in Azure Machine Learning Designer.
In this tutorial, you will create an inference pipeline and deploy a regression model as a service in Azure Machine Learning Designer. Firstly, you should follow the instructions provided in the article Predict CO2 emissions from cars with Azure Machine Learning to create a linear regression model that predicts carbon dioxide emissions from cars.
In this tutorial, you will learn how to:
Firstly, you will create a real-time inference pipeline that uses the existing trained model to predict label values. This pipeline performs the same data transformations for new data and includes web service inputs and outputs for data to be submitted or returned, respectively.
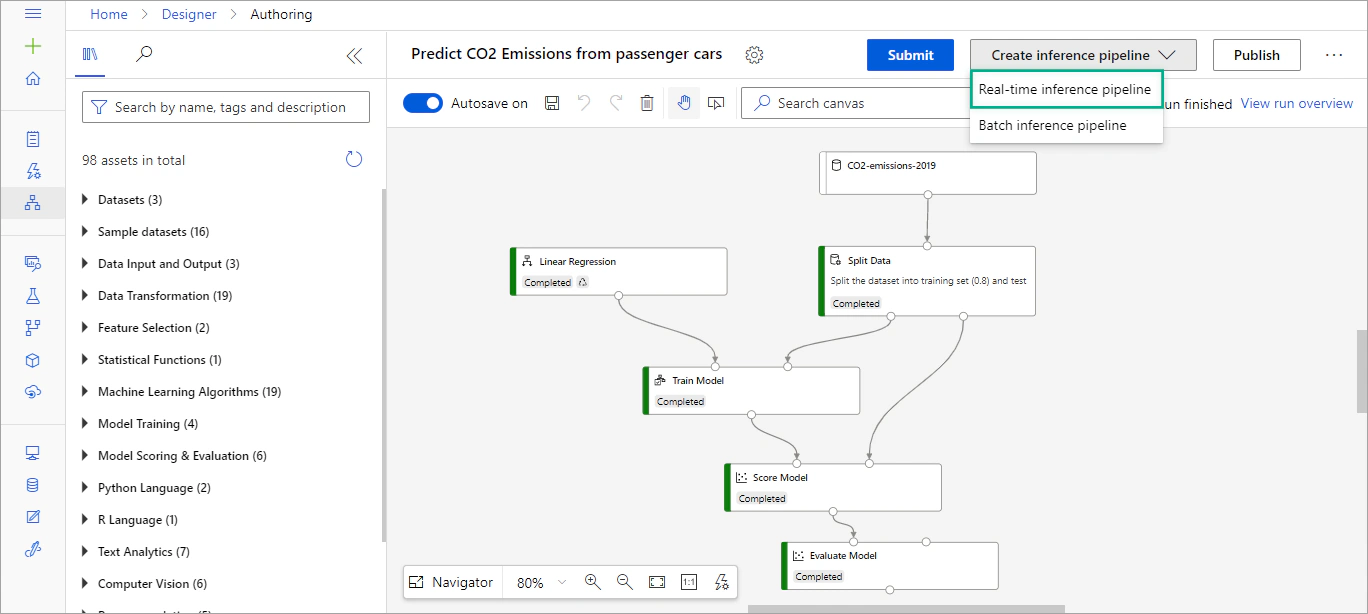
In your Azure Machine Learning workspace, select the Designer in the left pane and then open the “Predict CO2 Emissions from passenger cars” pipeline.
Select Create inference pipeline > Real-time inference pipeline.
After a few seconds, a new pipeline will be opened. Your real-time inference pipeline should look like this:
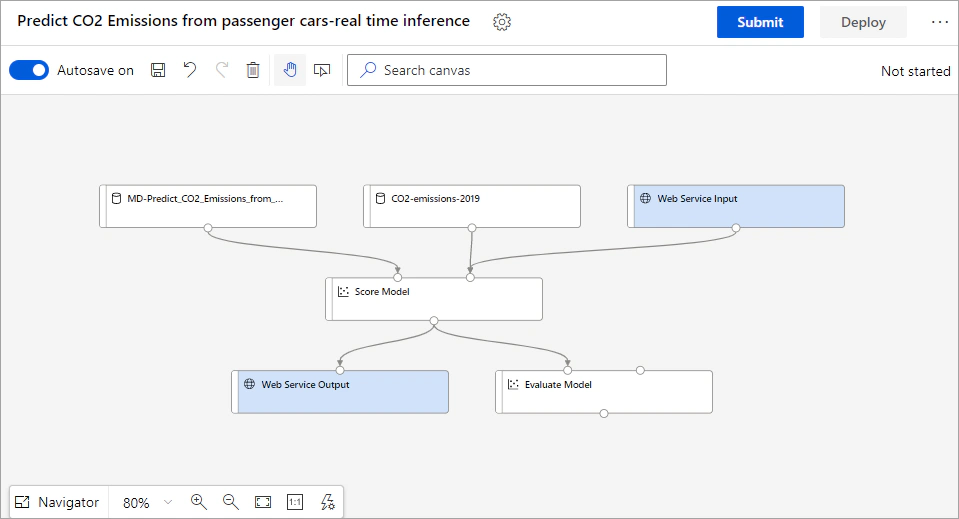
Delete the Evaluate Model module, because is not useful when making predictions from new data.
Delete the connection between the Score Model module and Web Service Output. In the left pane, expand the Python Language section and drag an Execute Python Script module onto the canvas.
Connect the output port of the Score Model module to the left-most input port of the Execute Python Script module and the left output port of the new module to the input port of Web Service Output.
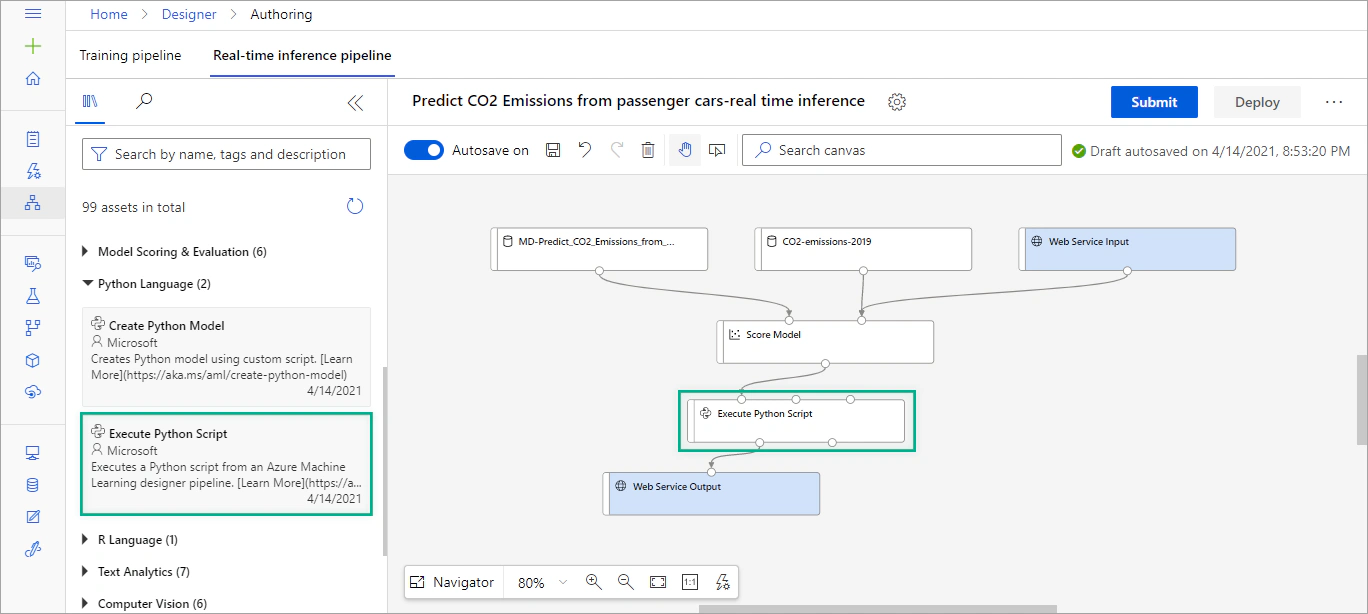
Replace the default script with the following Python code. This code selects only the Scored Labels column and renames it to Predicted CO2 Emissions.
| |
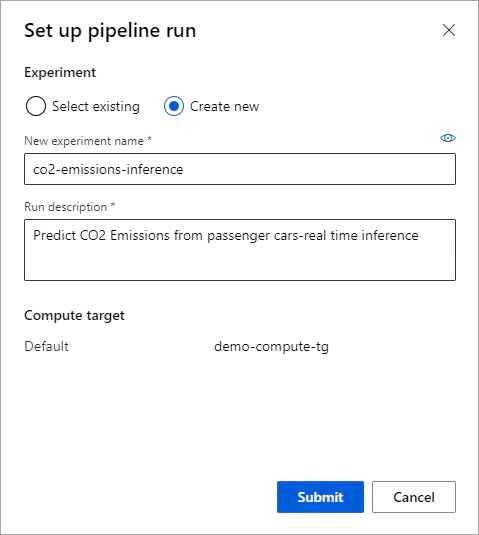
Once you are ready, submit the pipeline. In the Set up pipeline run window, select Create new to create a new experiment named co2-emissions-inference. Click Submit and wait for the operation to finish. The first pipeline run may take 15-20 minutes to be completed.
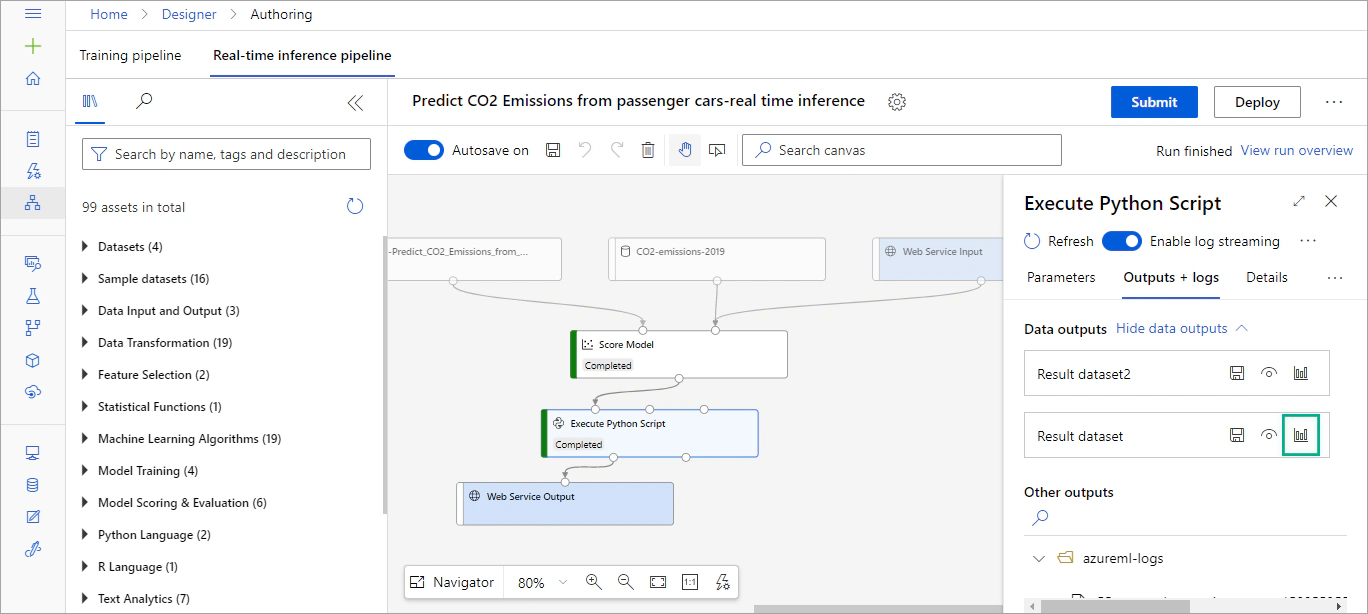
When the pipeline run has finished, select Execute Python Script > Outputs + logs > Result Dataset > Visualize.
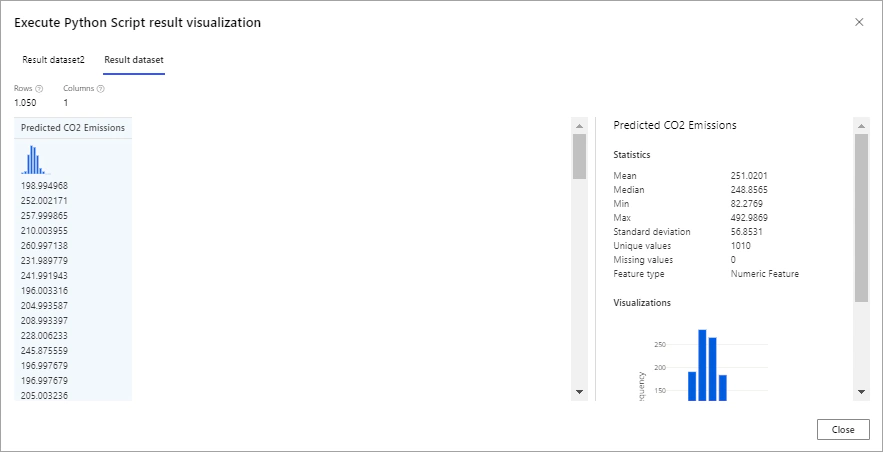
Verify that the Predicted CO2 Emissions column is displayed.
Now you are ready to publish the predictive service!
In the “Predict CO2 Emissions from passenger cars-real time inference” pipeline, select Deploy.
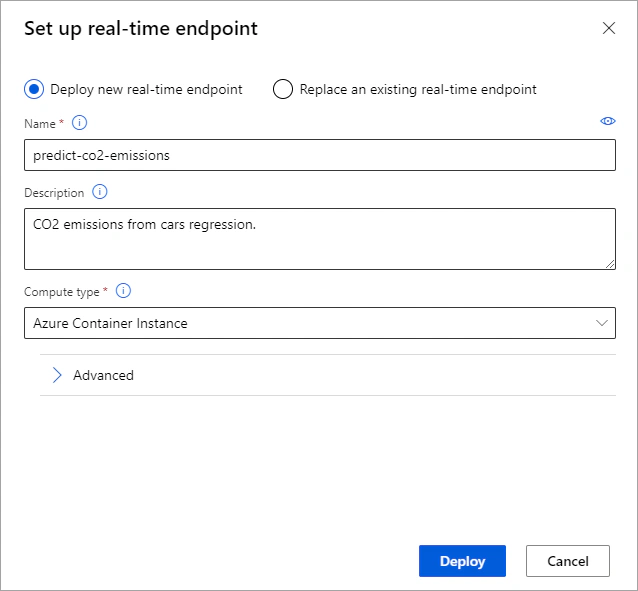
Then deploy a new real-time endpoint named predict-co2-emissions and select Azure Container Instance as Compute type.
You will create a compute instance in order to test your model.
In your Azure Machine Learning workspace, select the Compute tab in the left pane.
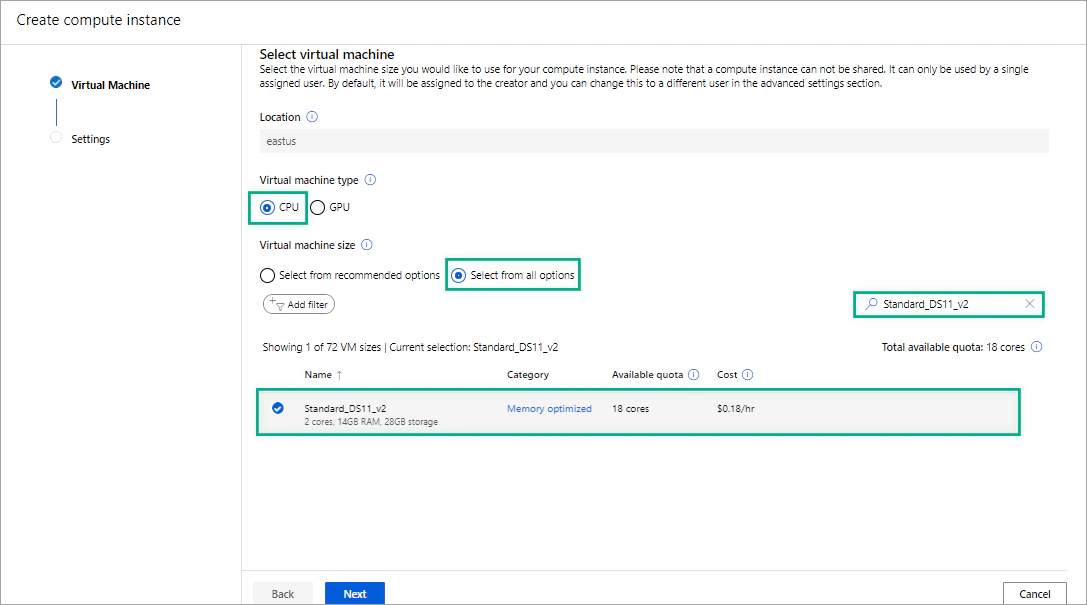
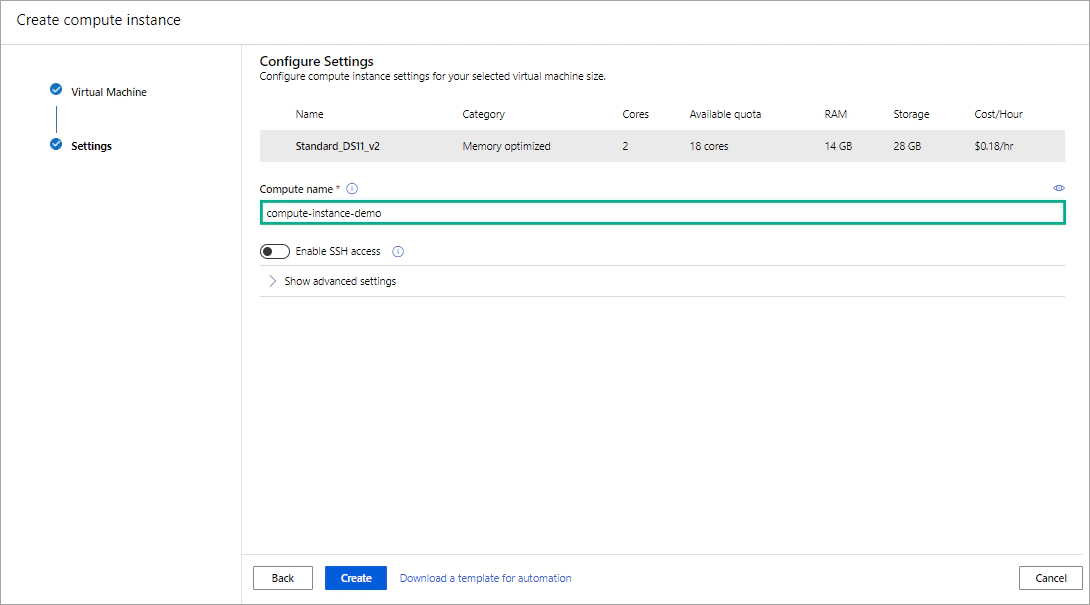
In the Compute Instances tab, select Create and create a new compute instance with the following settings:
Virtual machine type: CPU
Virtual machine size: Standard_DS11_v2 Under Virtual machine size, choose Select from all options and in the search field type Standard_DS11_v2.
Name: compute-instance-demo or another enter a unique name
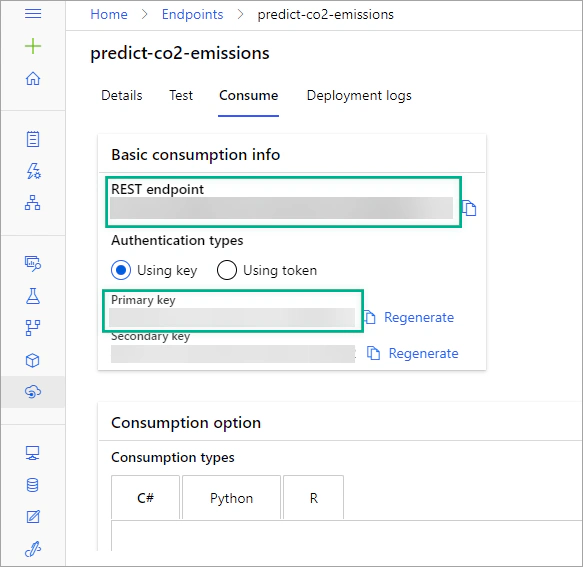
On the Endpoints page, select the predict-co2-emissions real-time endpoint and in the Consume tab save the REST endpoint and the Primary key of your service. You will need this information in the next steps.
On the Notebooks page, create a new Python Notebook name Test-co2-emissions.ipynb.
In the first cell of the new notebook, paste the following code (this code is derived from the Microsoft Learn module Create a Regression Model with Azure Machine Learning designer). The following code submits the details of a new car and returns the predicted CO2 emissions. Note that we need to include the label column (CO2 Emissions), because the schema of the new data must meet the schema of the training data. However, the label value won’t be considered when predicting the CO2 emissions of this car.
| |
Run the code and verify that the Predicted CO2 emissions value is returned.
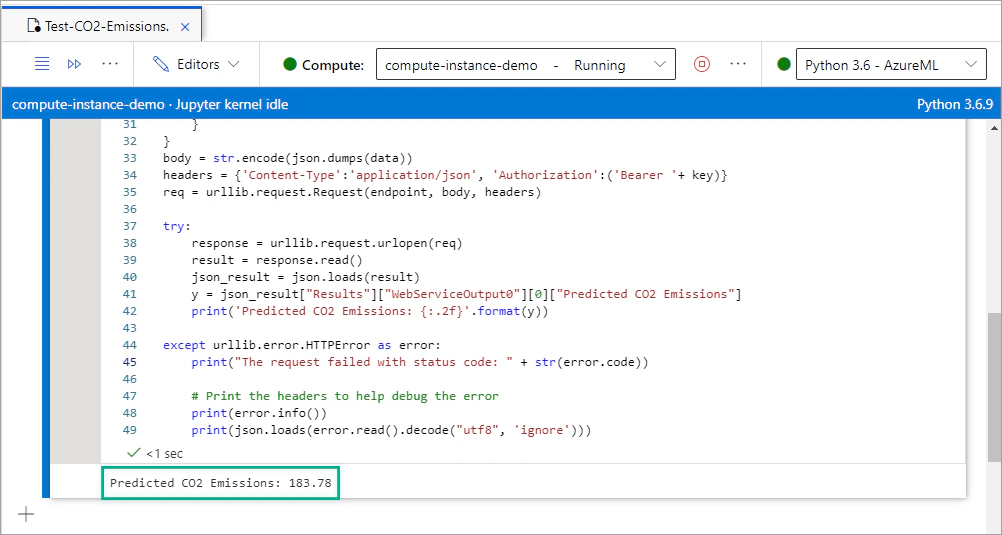
You can further explore your service by submitting information about other cars.
In the Azure portal, select Resource groups on the right menu and then select the resource group that you have created.
Click Delete resource group.

In this tutorial, you will create a classification model for chronic kidney disease prediction in Azure Machine Learning Designer.
In this tutorial, you will learn how to create a machine learning model in Azure Machine Learning to predict CO2 emissions from cars.
The workshop “Create no-code Machine Learning models with Azure Machine Learning” presented at ECESCON 12.

The session “Create no-code ML Models with Azure Machine Learning and Microsoft Learn” at Global AI Student Conference by Foteini Savvidou.