Get started with Azure Translator

Translator is a cloud-based service that is part of the Azure Cognitive Services and enables you to perform language translation and other language-related operations.

In this article, you will explore the Azure Translator service. You will:

  • Understand how the Azure Translator works.
  • Create a Python script to translate text and identify the language of the source text.

To complete the exercise, you will need to install:

  • Python 3, and
  • Visual Studio Code.

You will also need an Azure subscription. If you don’t have one, you can sign up for an Azure free account.

What is Translator?

Study the following sketch note to learn more about the capabilities of the Translator service.
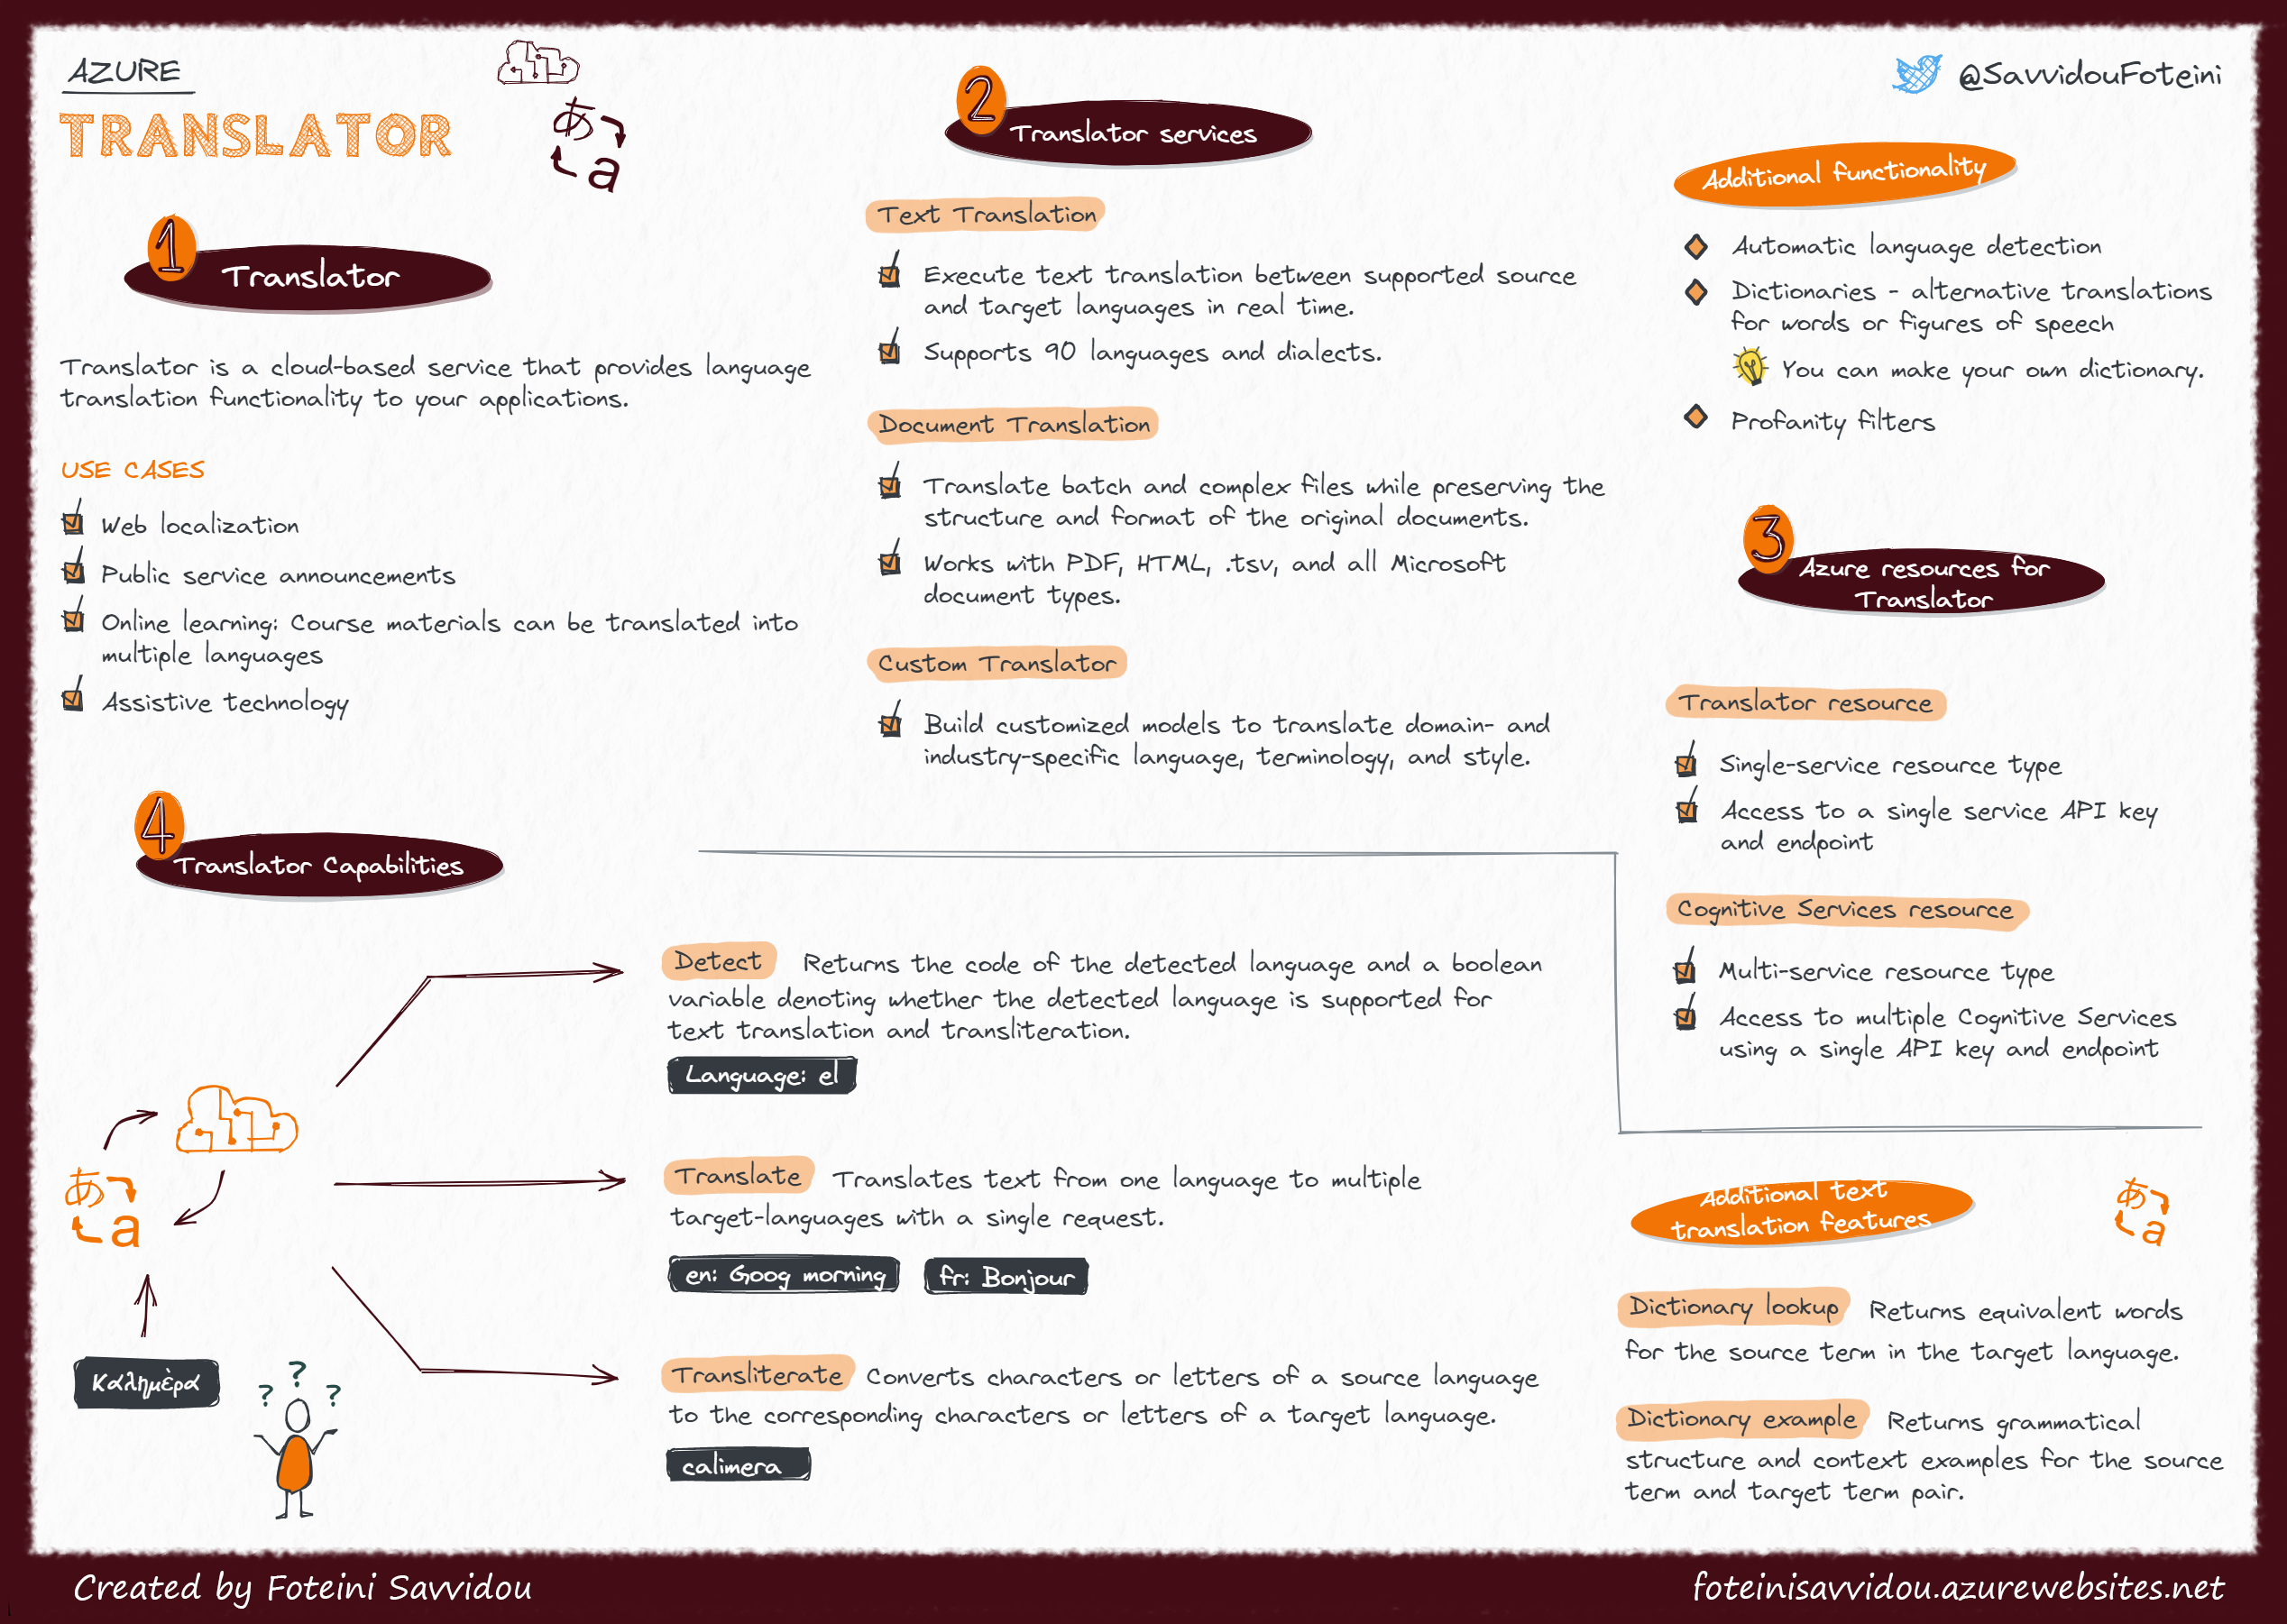
Azure Translator sketch note
Azure Translator

You can find more information and how-to-guides about Translator on Microsoft Learn and Microsoft Docs.

Create a Translator resource

To use the Azure Translator service, you can either create a Translator resource or a Cognitive Services resource. If you plan to use Azure Translator along with other cognitive services, such as Azure Computer Vision, you can create a Cognitive Services resource, or else you can create a Translator resource.

In this exercise, you will create a Translator resource.

  1. Sign in to Azure Portal and select Create a resource.

  2. Search for Translator and then click Create.

  3. Create a Translator resource with the following settings:
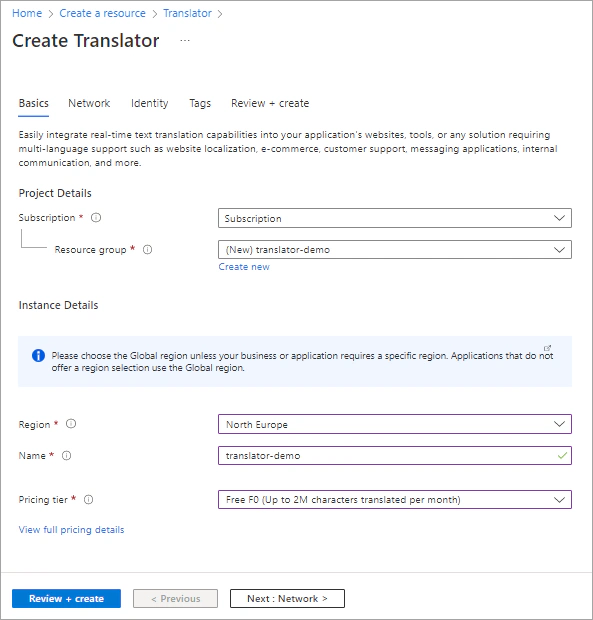
    • Subscription: Your Azure subscription.
    • Resource group: Select an existing resource group or create a new one.
    • Region: Choose any available region, for example North Europe.
    • Name: This would be your custom domain name in your endpoint. Enter a unique name.
    • Pricing tier: Free F0.
    Create a Translator resource
  4. Once the deployment is complete, select Go to resource and view the Keys and Endpoint page. Save the Key 1 and the Endpoint for Text Translation. You will need the key and the endpoint to connect from client applications.
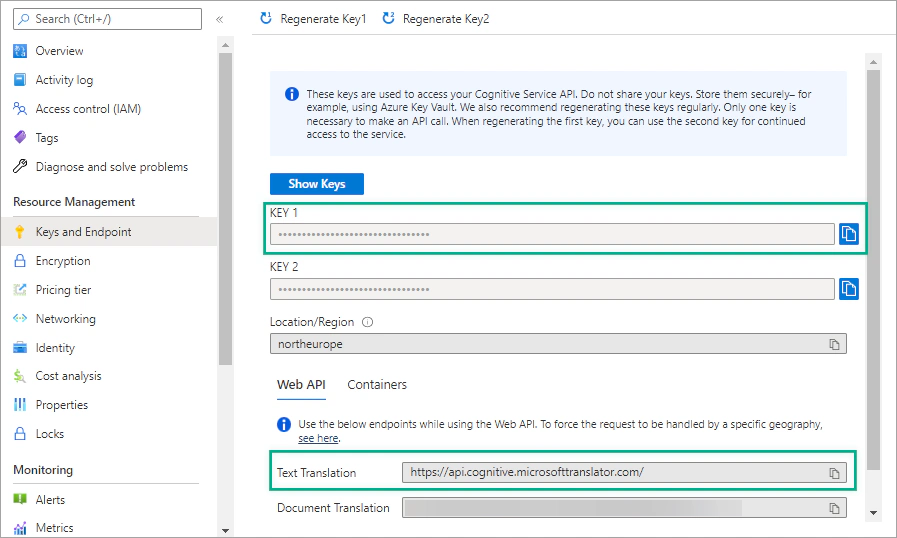
    Keys and endpoint of the Translator resource

Set up your application

  1. Create a configuration file (.env) and add the authentication key and the region of your Translator resource.

  2. Create a new Python file (translator-demo.py) and import the following libraries.

    1
    2
    3
    
    from dotenv import load_dotenv
    import os
    import requests
    
  3. Add the following code to load the Translator key from the configuration file and specify the endpoint.

    1
    2
    3
    4
    
    load_dotenv()
    key = os.getenv('KEY')
    region=os.getenv('REGION')
    endpoint = 'https://api.cognitive.microsofttranslator.com'
    

Detect language

Define the detect_language function which automatically detects the language of the source text and returns the language code.

 1
 2
 3
 4
 5
 6
 7
 8
 9
10
11
12
13
14
15
16
17
18
19
20
21
22
23
def detect_language(text, key, region, endpoint):
    # Use the Translator detect function
    path = '/detect'
    url = endpoint + path
    # Build the request
    params = {
        'api-version': '3.0'
    }
    headers = {
    'Ocp-Apim-Subscription-Key': key,
    'Ocp-Apim-Subscription-Region': region,
    'Content-type': 'application/json'
    }
    body = [{
        'text': text
    }]
    # Send the request and get response
    request = requests.post(url, params=params, headers=headers, json=body)
    response = request.json()
    # Get language
    language = response[0]["language"]
    # Return the language
    return language

Add the following code and run the script:

1
print(detect_language('Hello world!', key, region, endpoint))

Translate text

Define the translate function which translates the given text from the source_language into the target_language and returns the translated text.

 1
 2
 3
 4
 5
 6
 7
 8
 9
10
11
12
13
14
15
16
17
18
19
20
21
22
23
24
def translate(text, source_language, target_language, key, region, endpoint):
    # Use the Translator translate function
    url = endpoint + '/translate'
    # Build the request
    params = {
        'api-version': '3.0',
        'from': source_language,
        'to': target_language
    }
    headers = {
        'Ocp-Apim-Subscription-Key': key,
        'Ocp-Apim-Subscription-Region': region,
        'Content-type': 'application/json'
    }
    body = [{
        'text': text
    }]
    # Send the request and get response
    request = requests.post(url, params=params, headers=headers, json=body)
    response = request.json()
    # Get translation
    translation = response[0]["translations"][0]["text"]
    # Return the translation
    return translation

Add the following code and run the script:

1
print(translate('Hello world!', 'en', 'el', key, region, endpoint))

It is also possible to translate the given text into two or more languages. Modify the translate function as follows:

 1
 2
 3
 4
 5
 6
 7
 8
 9
10
11
12
13
14
15
16
17
18
19
20
21
22
23
24
25
26
27
def translate(text, source_language, target_language, key, region, endpoint):
    # Use the Translator translate function
    url = endpoint + '/translate'
    # Build the request
    params = {
        'api-version': '3.0',
        'from': source_language,
        'to': target_language
    }
    headers = {
        'Ocp-Apim-Subscription-Key': key,
        'Ocp-Apim-Subscription-Region': region,
        'Content-type': 'application/json'
    }
    body = [{
        'text': text
    }]
    # Send the request and get response
    request = requests.post(url, params=params, headers=headers, json=body)
    response = request.json()
    # Get translation
    translation = []
    translations = response[0]["translations"]
    for t in translations:
        translation.append(t['text'])
    # Return the translation
    return translation

Add the following code and run the script:

1
2
3
4
target_lang = ['el','de','fr','it','th']
results = translate('Hello world!', 'en', target_lang, key, region, endpoint)
for i in range(len(results)):
    print(target_lang[i] + ":", results[i])

Summary and next steps

In this article, you explored the Azure Translator and build a Python script to detect the language of a given text and translate text from the source language into one or more target languages. For more information about using the Translator service, see the Translator documentation.

Clean-up

If you have finished learning, you can delete the resource group from your Azure subscription:

  1. In the Azure portal, select Resource groups on the right menu and then select the resource group that you have created.
  2. Click Delete resource group.

You May Also Like