Use a TensorFlow model exported from Azure Custom Vision
In this article, you will learn how to export a Custom Vision model in TensorFlow format for use with Python apps.
Santa Claus has been kidnapped! The Christmas elves have called upon you to save Santa Claus by developing an intelligent Custom Vision app. You will build an object detection system that detects Santa Claus in images taken from live cameras mounted all over the Christmas village.
Azure Custom Vision is an Azure Cognitive Services service that lets you build and deploy your own image classification and object detection models. Image classification models apply labels to an image, while object detection models return the bounding box coordinates in the image where the applied labels can be found.
Do you want to learn more about Azure Custom Vision? You can read my previous articles about creating a Custom Vision model for flower classification and an object detection model for grocery checkout.
In this article, we will build and deploy a festive Custom Vision object detection model to help the Christmas elves find Santa Claus. You will learn how to:
To complete the exercise, you will need an Azure subscription. If you don’t have one, you can sign up for an Azure free account.
To build and train our machine learning model, I created an image dataset consisting of 50 images of Santa Claus. You can download the dataset from my GitHub repository.
To use the Custom Vision service, you can either create a Custom Vision resource or a Cognitive Services resource. If you plan to use Custom Vision along with other cognitive services, you can create a Cognitive Services resource.
In this exercise, you will create a Custom Vision resource.
Sign in to the Azure Portal and select Create a resource.
Search for Custom Vision and in the Custom Vision card click Create.
Create a Custom Vision resource with the following settings:
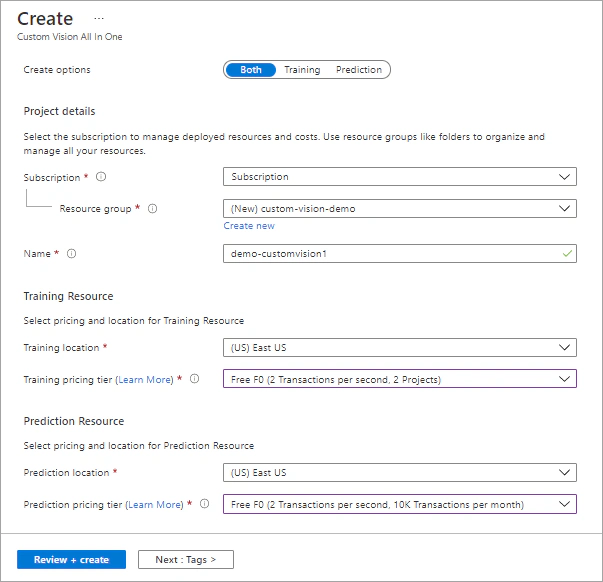
Select Review + Create and wait for deployment to complete.
Once the deployment is complete, select Go to resource. Two Custom Vision resources are provisioned, one for training and one for prediction.
You can build and train your model by using the web portal or the Custom Vision SDKs and your preferred programming language. In this article, I will show you how to build an object detection model using the Custom Vision web portal.
Navigate to the Custom Vision portal and sign in.
Create a new project with the following settings:
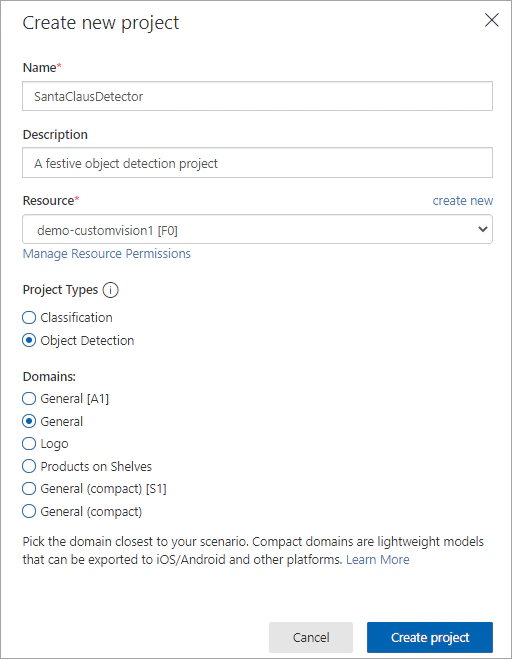
Select Create project.
In your Custom Vision project, select Add images.
Select and upload all the images in the Train folder you extracted previously.
Open the first image and manually tag the objects that you want the model to learn to recognize.
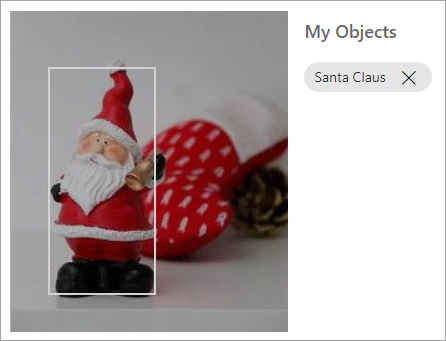
Repeat the previous step for the remaining images.
Then, explore the images that you have uploaded. There should be 42 images of Santa Claus.
Select Add images and upload all the images in the SmartLabeler folder. Do not tag these images. You will train the model and then use the Smart Labeler to easily generate labels for the untagged images.
In the top menu bar, click the Train button to train the model using the tagged images.
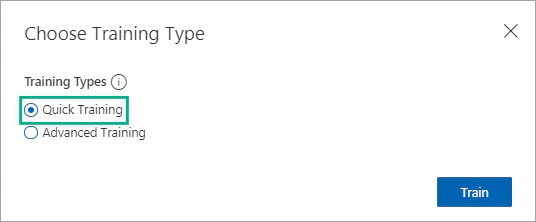
Then, in the Choose Training Type window, select Quick Training and wait for the training iteration to complete.
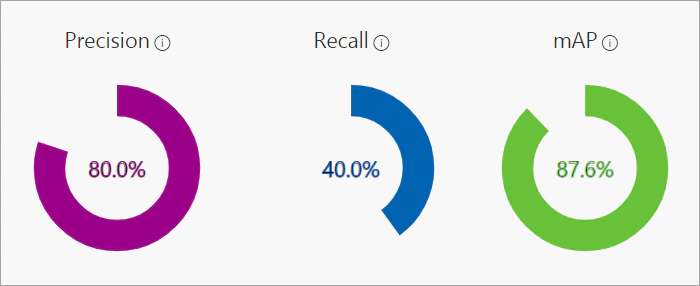
When the training finishes, information about the model’s performance is estimated and displayed.
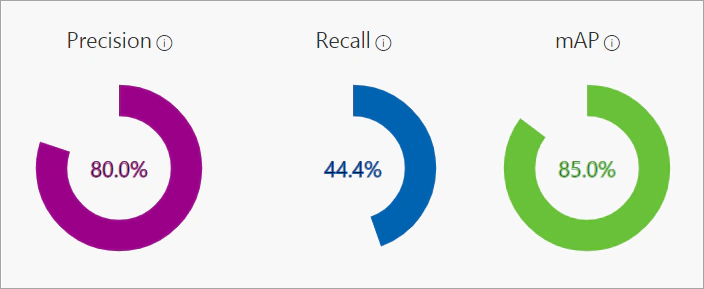
The Custom Vision service calculates three metrics:
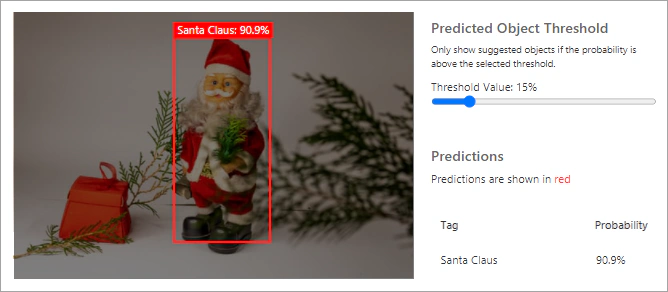
Let’s test the model and see how it performs on new data. We will use the images in the Test folder you extracted previously.
In the top menu bar, select Quick Test.
In the Quick Test window, click the Browse local files button and select a local image. The prediction is shown in the window.
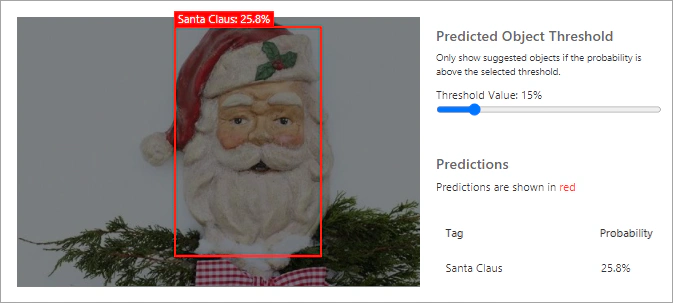
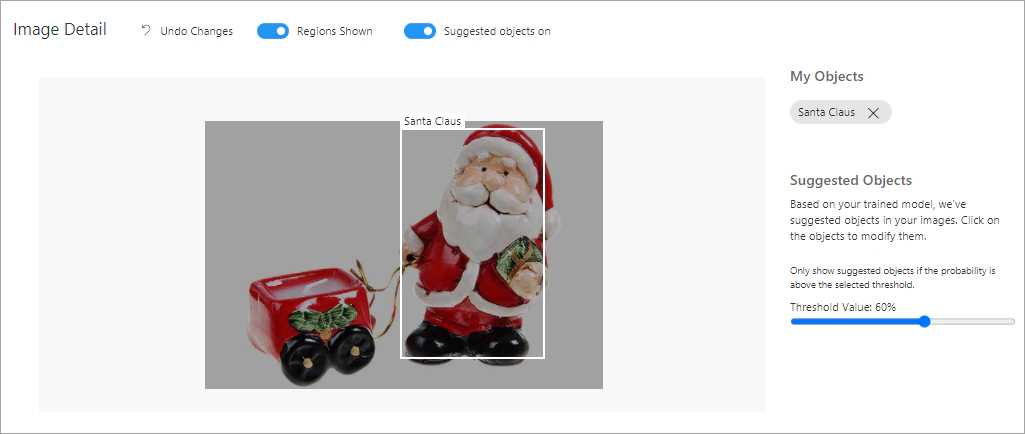
The Smart Labeler enables you to quickly tag a large number of images. The service uses the latest iteration of the trained model to predict the label of the untagged images. You can then confirm or decline the suggested tag.
Navigate to the Training Images tab and under Tags select Untagged.
Then, click the Get suggested objects button on the left pane.
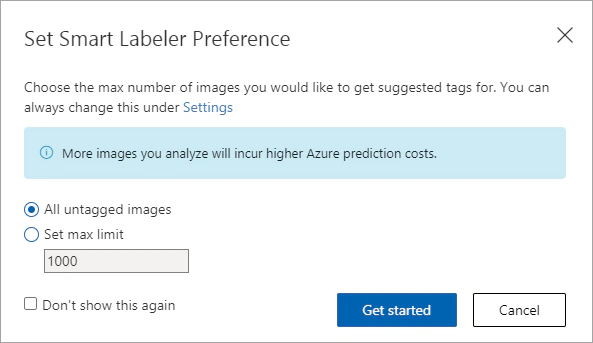
In the Set Smart Labeler Preference window, select the number of images for which you want suggestions.
In this article, we will use the Smart Labeler to label all the untagged images. In the Set Smart Labeler Preference window, select All untagged images and then click Get started.
Once the process is complete, you can confirm the suggestions or change the suggested labels and bounding box coordinates manually.
You can learn more about the Smart Labeler at the Custom Vision Service Documentation.
In the top menu bar, click the Train button and wait for the second training iteration to complete.
Once the training is complete, review the performance metrics of the new model.
You can add more images in your model to improve the performance metrics. Learn more about how to improve your object detection model at the Custom Vision Service Documentation.
Before publishing our model, let’s test it and see how it performs on new data.
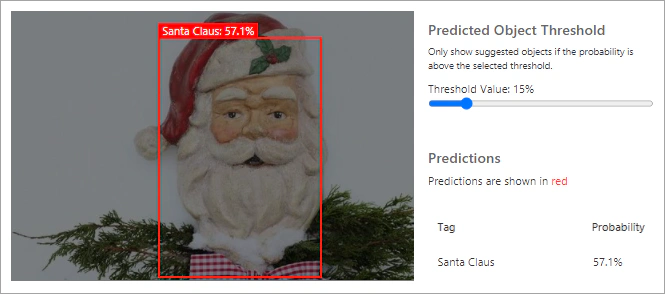
Once your model is performing at a satisfactory level, you can deploy it.
In the Performance tab, select the latest iteration and then click Publish.
In the Publish Model window, under Prediction resource, select the name of your Custom Vision prediction resource and then click Publish.
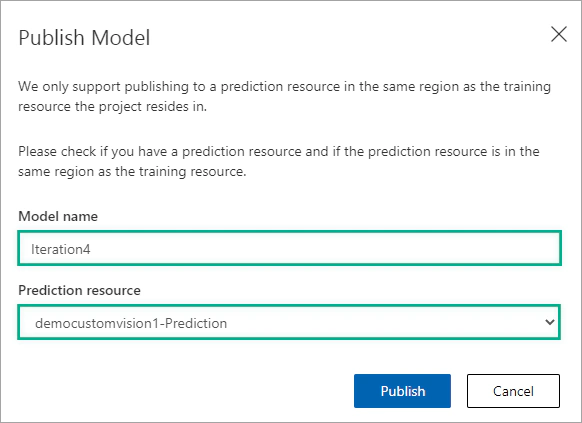
Once your model has been successfully published, you’ll see a Published label appear next to your iteration name in the left sidebar.
In the Custom Vision portal, click the settings icon (⚙) at the top toolbar to view the project settings. Then, under General, copy the Project ID.
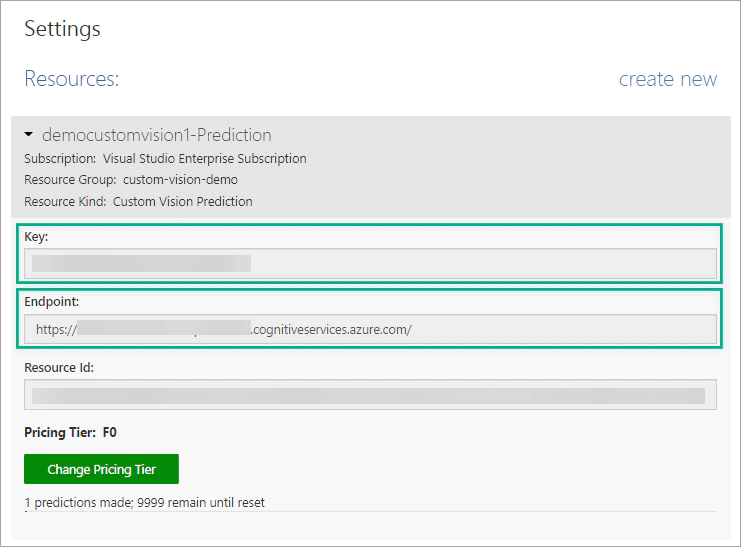
Navigate to the Custom Vision portal homepage and select the settings icon (⚙) at the top right. Expand your prediction resource and save the Key and the Endpoint.
To create an object detection app with Custom Vision for Python, you’ll need to install the Custom Vision client library. Install the Azure Cognitive Services Custom Vision SDK for Python package with pip:
| |
Then, create a new Python script (test.py) and open it in Visual Studio Code or in your preferred editor.
Want to view the whole Python script at once? You can find it on GitHub.
Import the following libraries.
| |
In the next cell add this code. Relace <YOUR_PROJECT_ID>, <YOUR_KEY> and <YOUR_ENDPOINT> with the ID of your project, the Key and the Endpoint of your prediction resource, respectively.
| |
Then, use the following code to call the prediction API in Python.
| |
Next add the following code, which displays the test image, the detected objects and their tags along with their probabilities.
| |
First, install OpenCV using the following command:
| |
We will use OpenCV to get an image from the camera, then we will analyze the image using our Custom Vision model and display a bounding box around every detected object.
Create a new Python script (test-camera.py) and import the following libraries.
| |
Then, add this code to define your credentials.
| |
Use the following code to take an image from your camera and save it in a file.
| |
Then, call the prediction API.
| |
Now, you can display the predicted probabilities and a bounding box around every detected object.
| |
Then, release the camera you have used.
| |
In this article, you learned how to create an object detection model in Azure Custom Vision and use a Custom Vision model in a Python app.
If you have finished learning, you can delete the resource group from your Azure subscription:
In the Azure Portal, select Resource groups on the right menu and then select the resource group that you have created.
Click Delete resource group.

In this article, you will learn how to export a Custom Vision model in TensorFlow format for use with Python apps.
The session “A festive introduction to Computer Vision with Azure Custom Vision” presented at the Yearly Edu Summit – Fall 2021.
In this article, you will deploy a function project to Azure using Visual Studio Code to create a serverless HTTP API.
In this article, you will create a Python Azure Function with HTTP trigger to consume a TensorFlow machine learning model.